Introduction
A few months ago I found that Team Xecuter was looking for testers for the unreleased SX Core and SX Lite modchip and as I had already written some homebrew for my old unpatched console after Fusée Gelée was released I decided to ask for a free test unit.
To my surprise, the process was pretty straightforward and in less than 24 hours I had been approved to receive one of the first pre-production units.
Due to unforeseen circumstances (mainly COVID-19), manufacturing and packaging was delayed by several months.
At the beginning of March, everything was ready to start production; the only reason for the delay was because of extended wait times for some components and so it wasn't until the beginning of May that the first units started shipping. It took around a week for mine to arrive, and I ended picking it up from the UPS depot on May 20th.
And so, without further ado, let's get started!
Package Contents
There are two versions of the modchip, the SX Core for regular consoles which works for both Erista and Mariko and the SX Lite for the Switch Lite.
At the time of choosing you were given the opportunity of asking for either or both units but, at the time, there was no release date for the SX Lite(this was before COVID, so both units would have been sent on the same package at a much later date) and as the only working console I had for testing was a patched Mariko unit I decided to get only the Core version thinking that it would arrive much earlier.

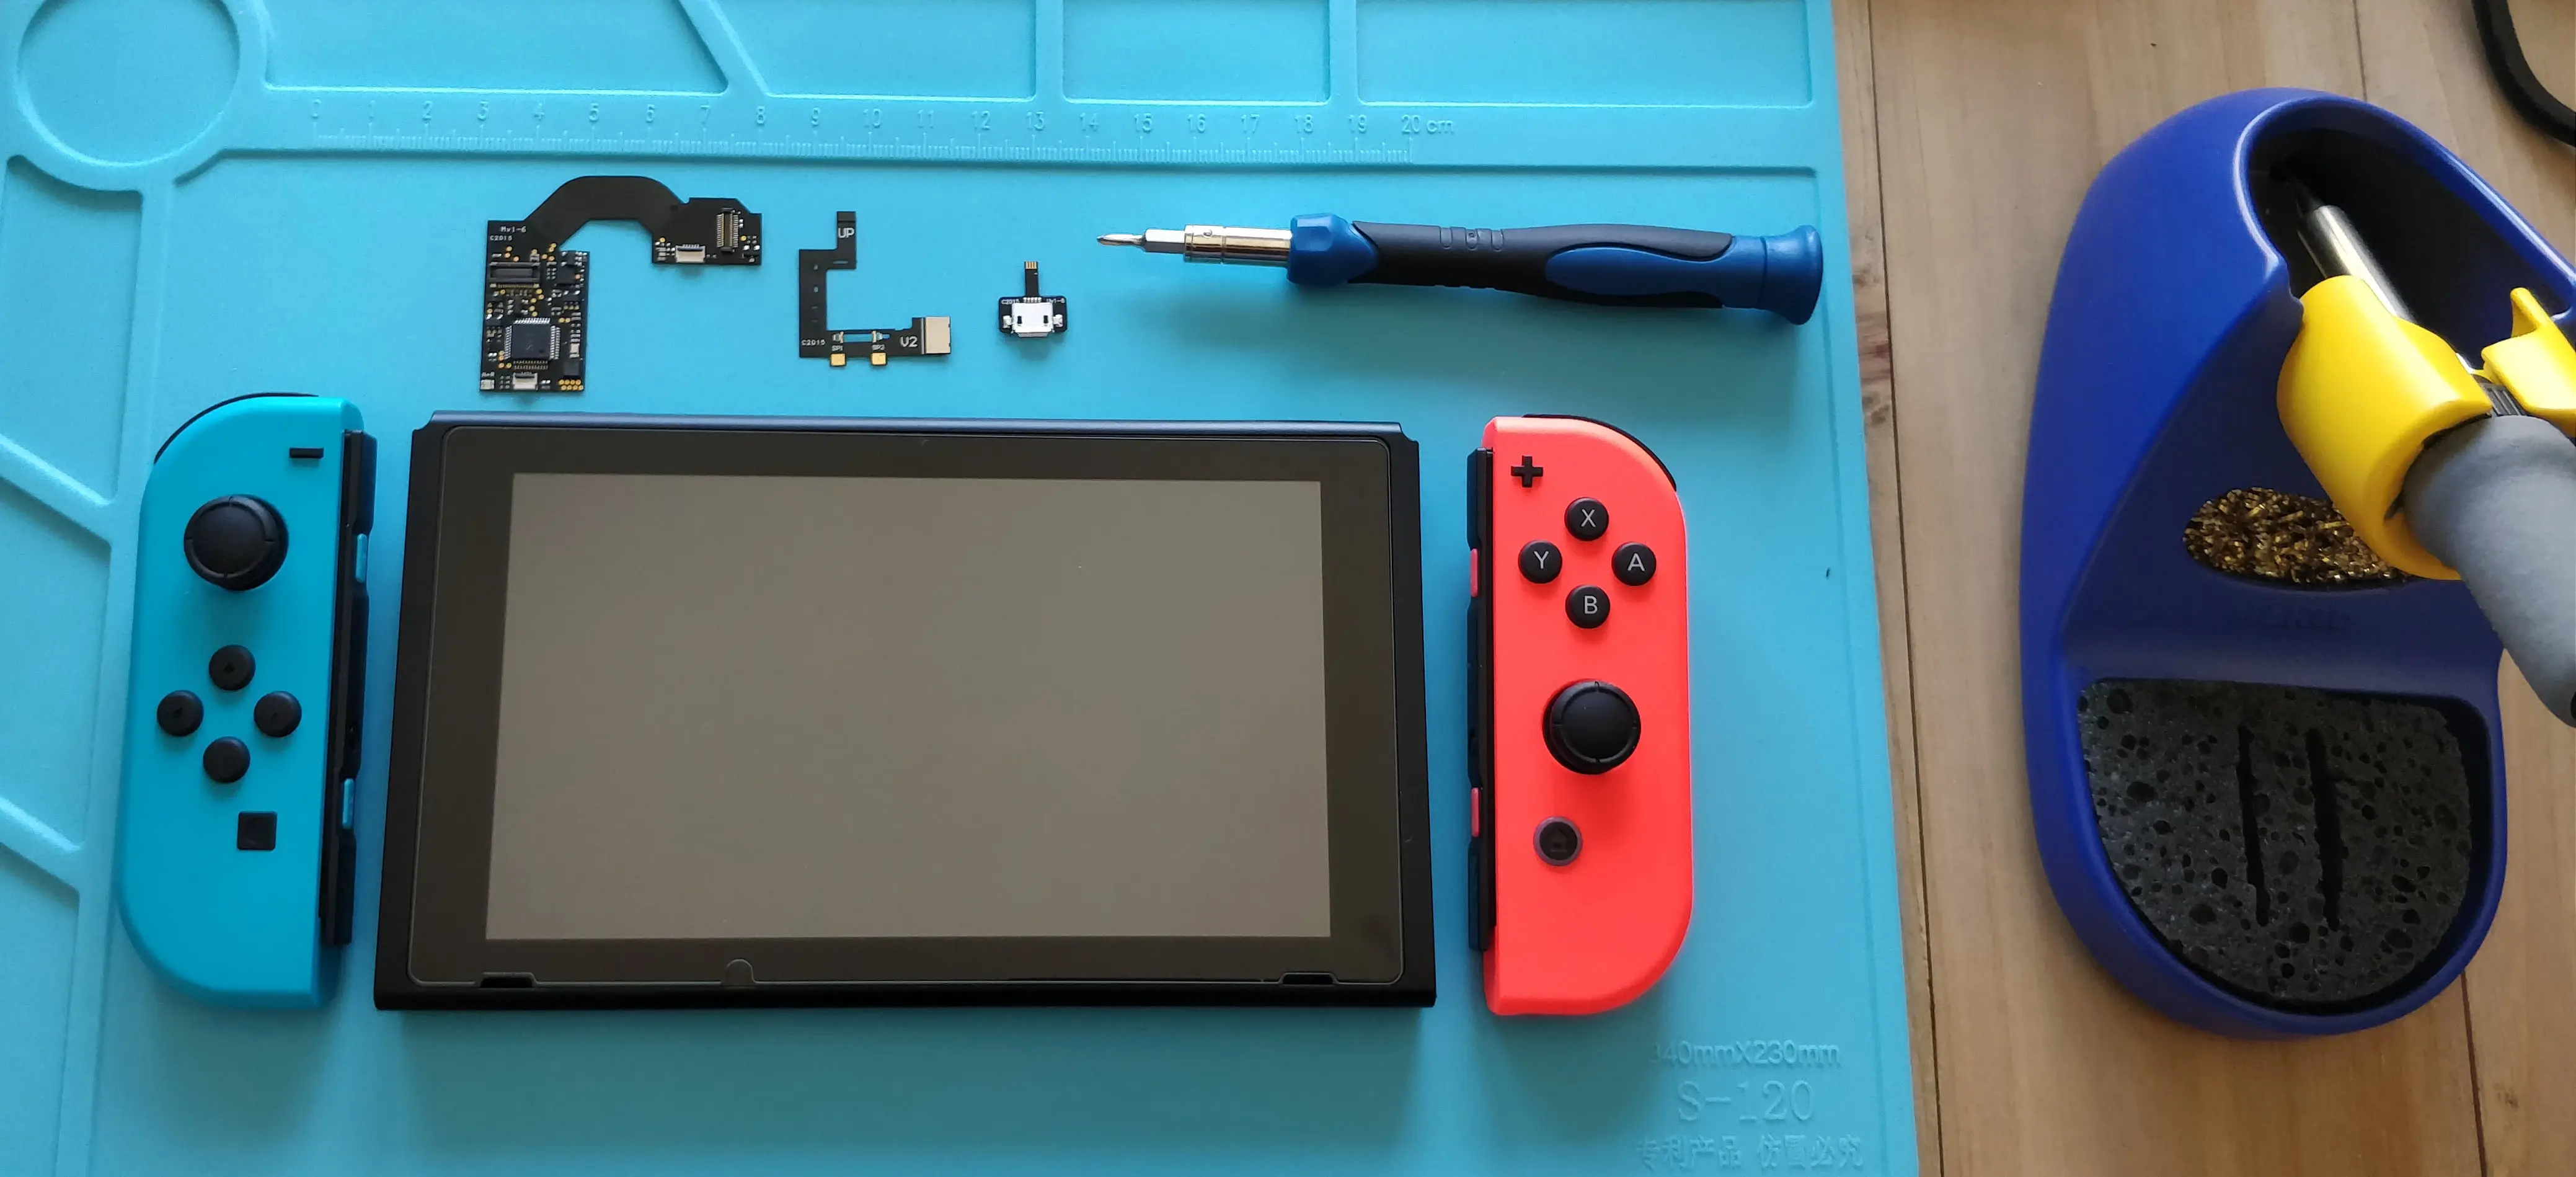
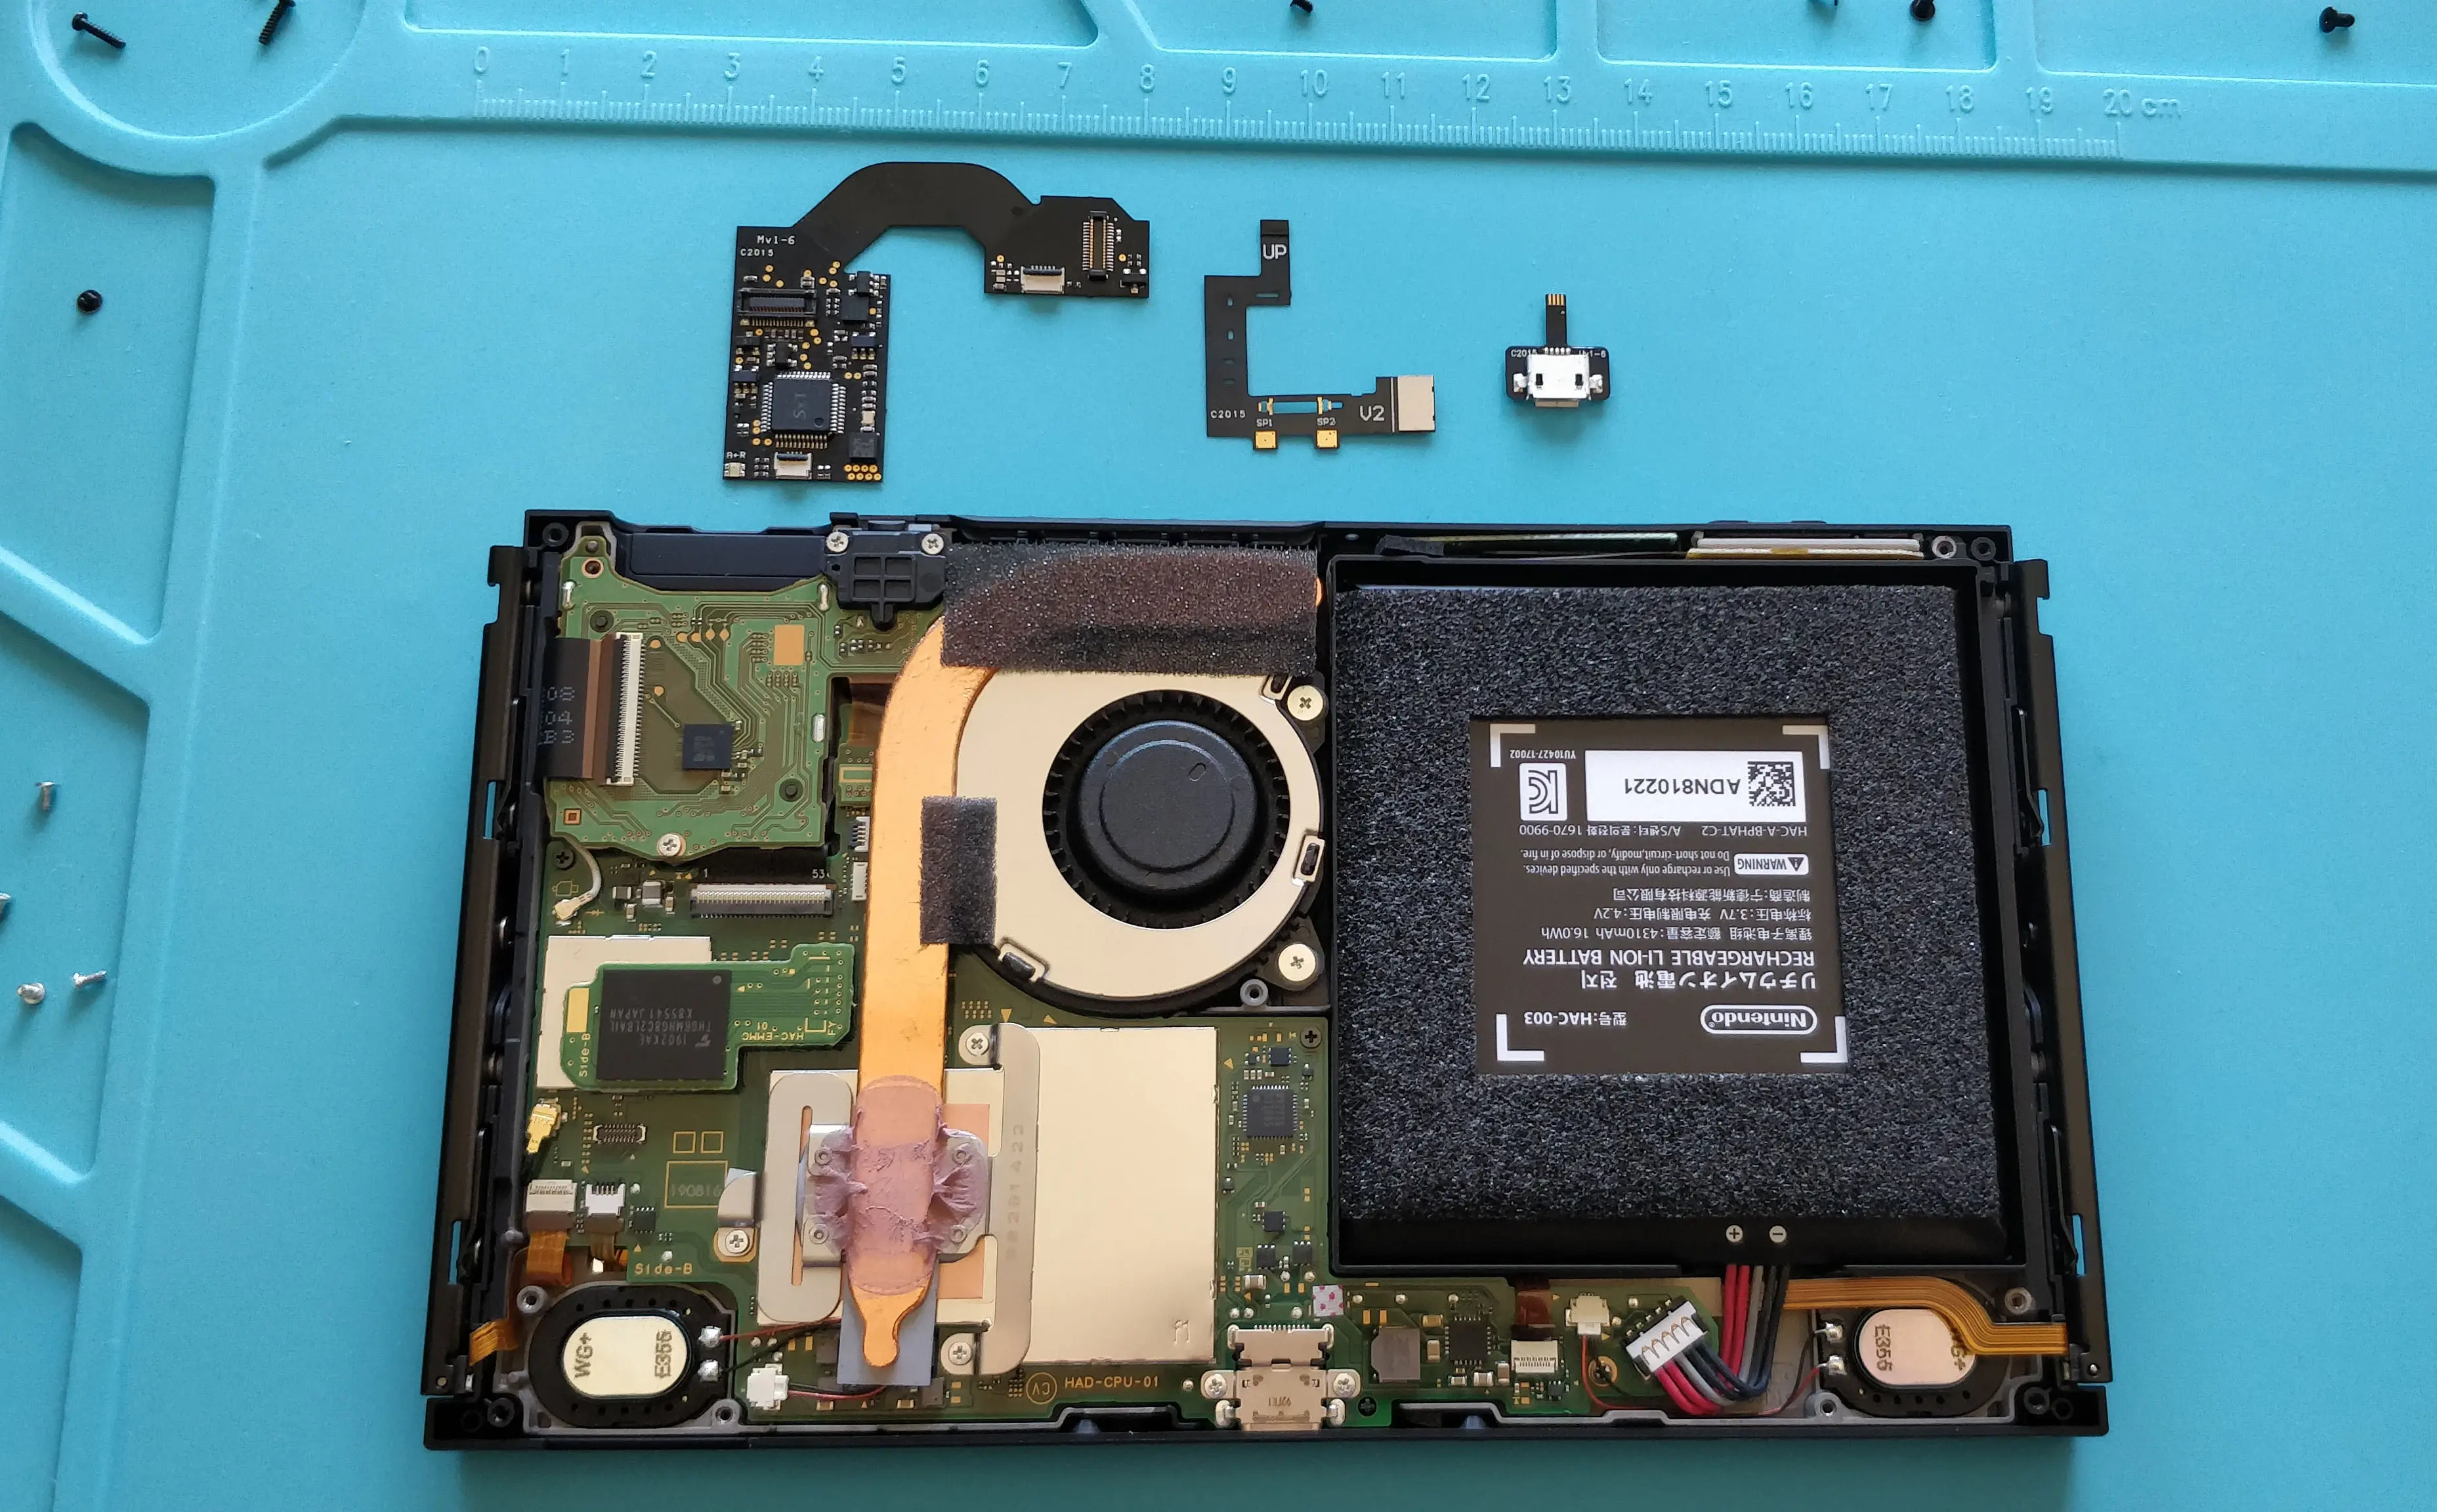
Once opened, the box for the regular version contains:
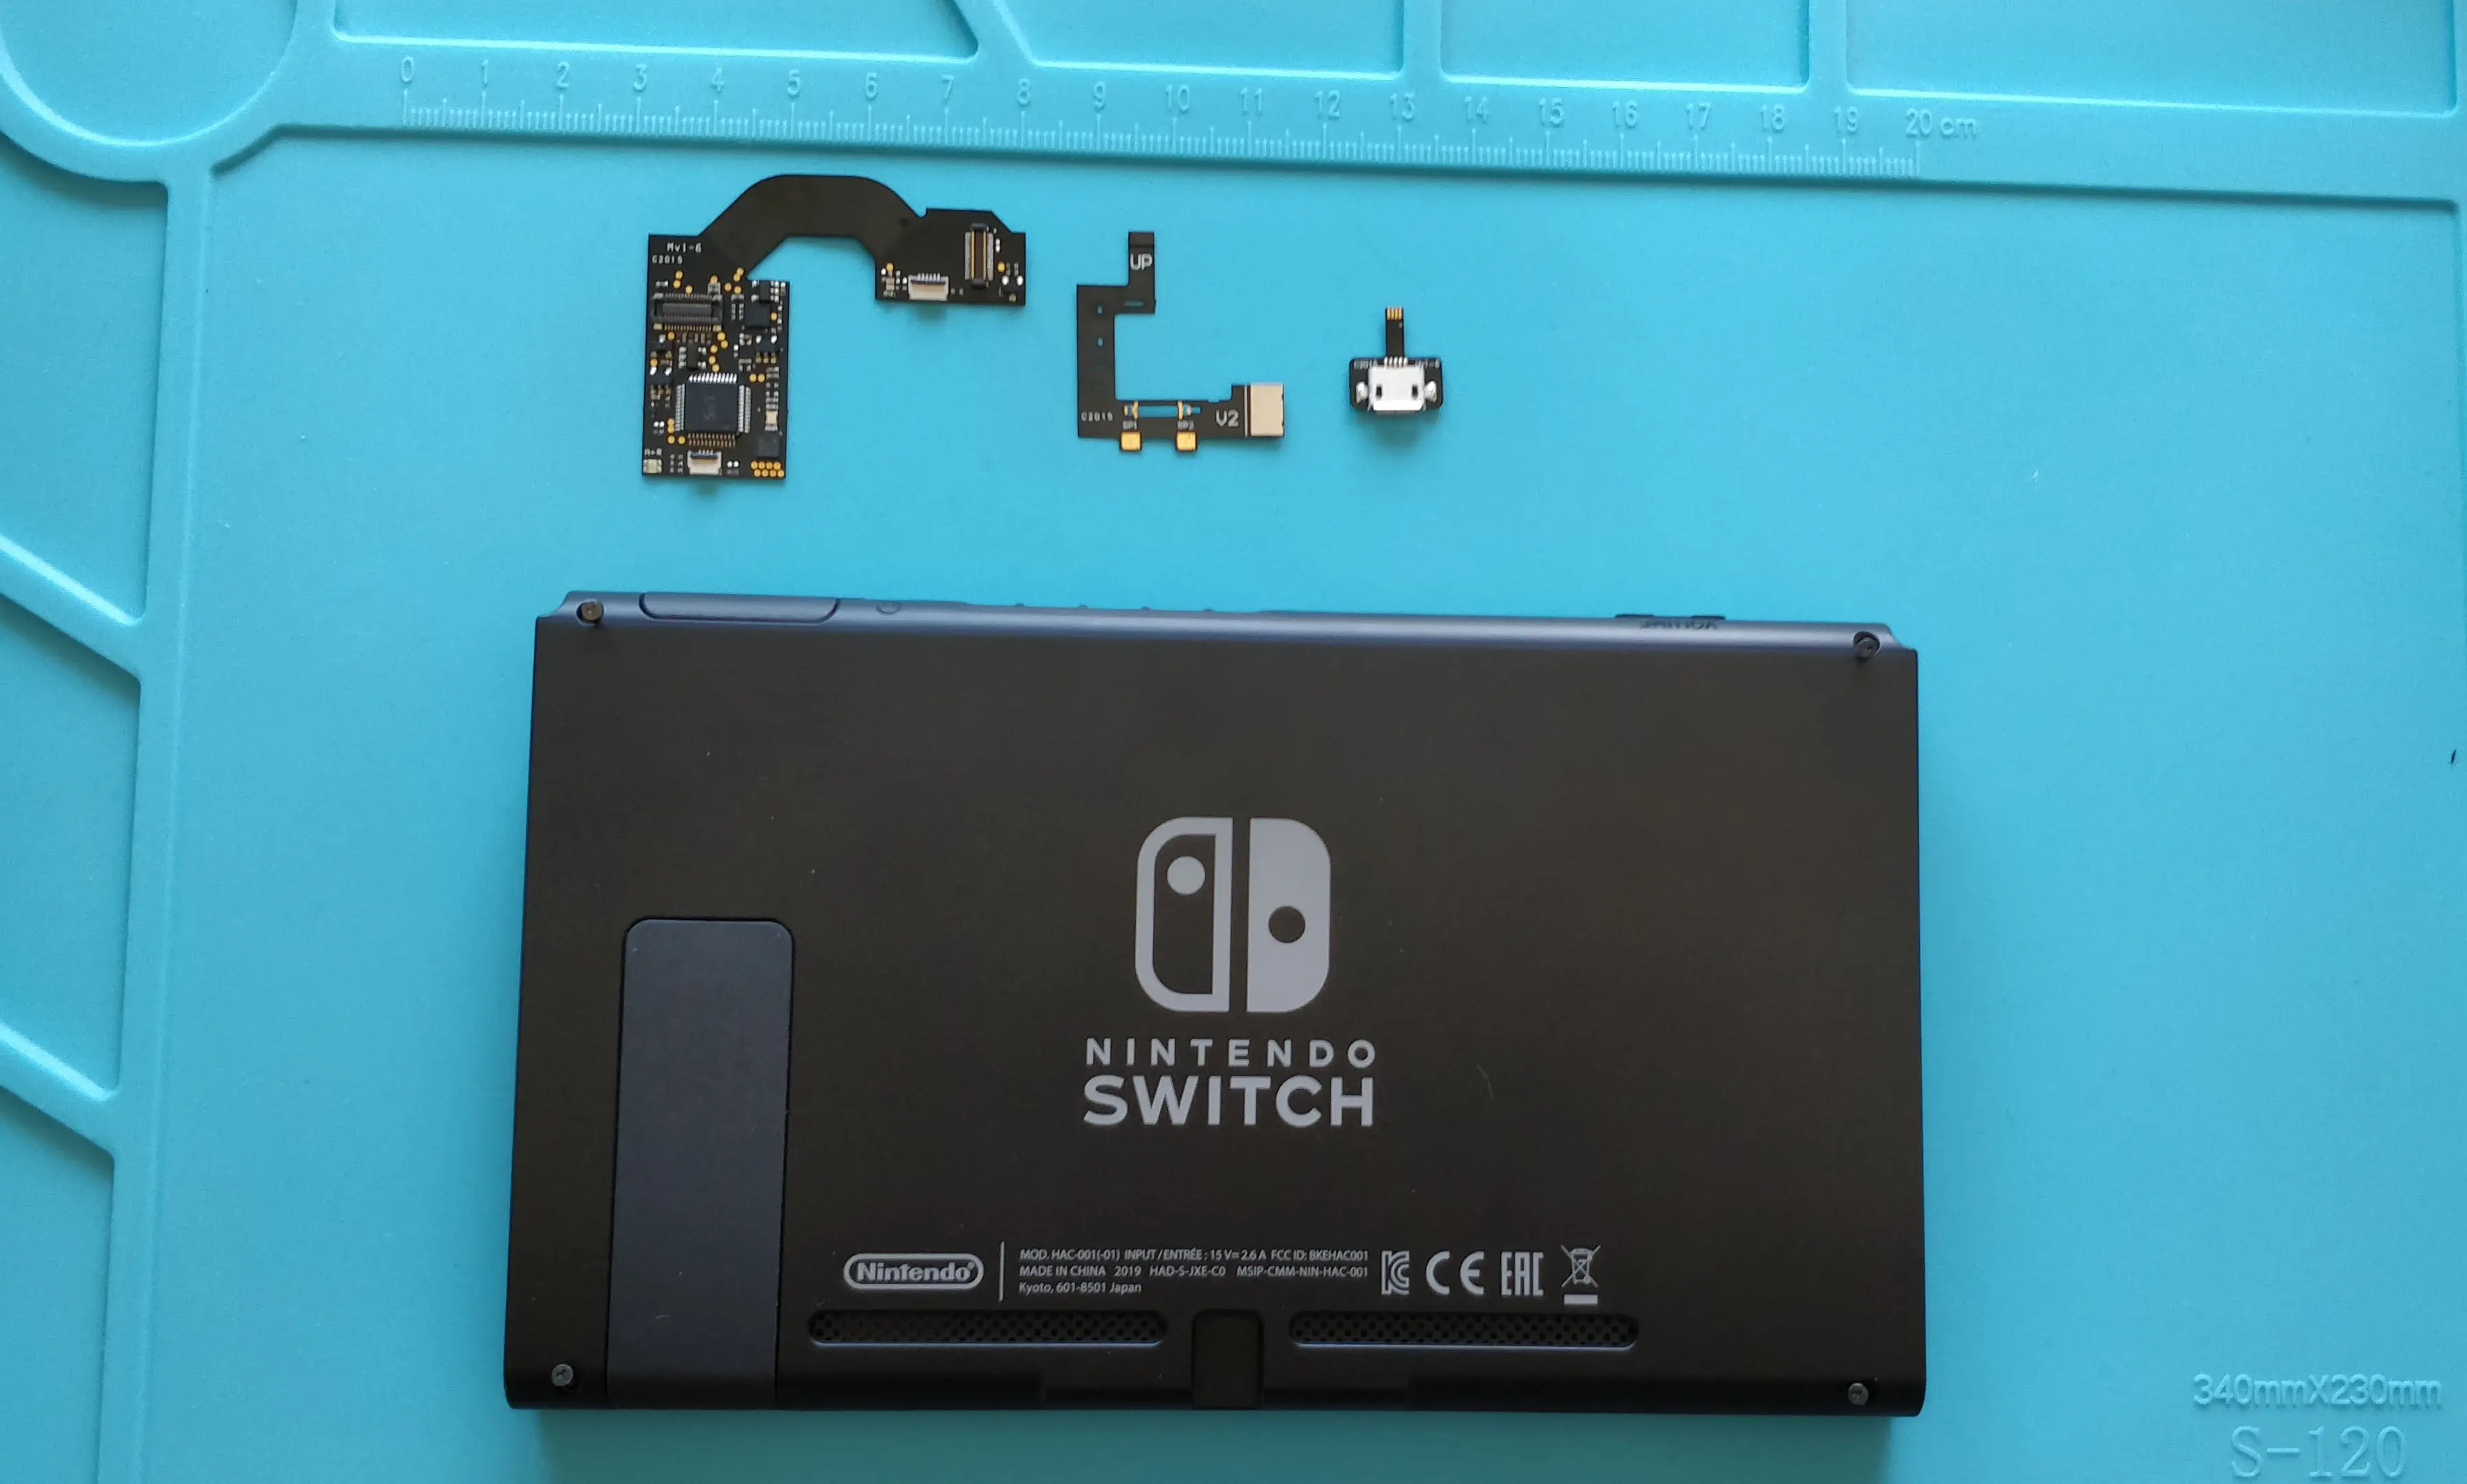
- Main Board.
- Glitch adapter for Erista (V1) and Mariko (V2) units.
- Micro USB connector for debugging.
 Main Board
 |
 USB Debug/Log
 |
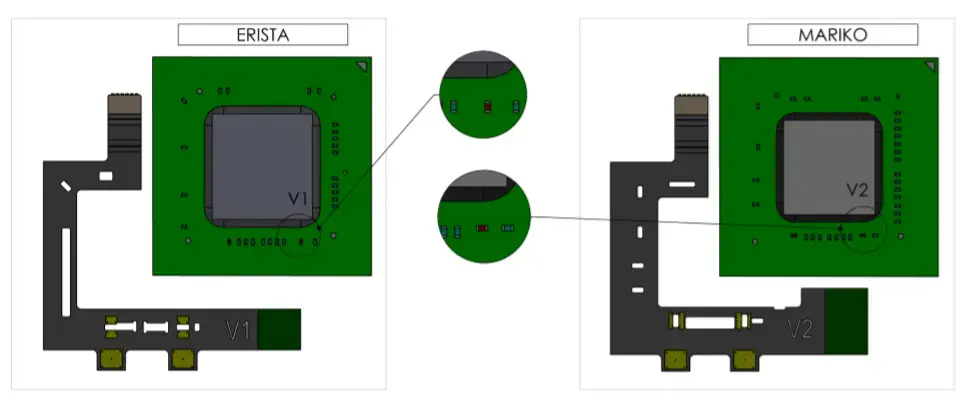
 Erista (V1) adapter
 |
 Mariko (V2) adapter
 |
No manual or other documentation is included with the package; there are only two privately shared documents with pictures of the installation process.
Installation
Modchip installation is pretty simple and took about 25-30 minutes to figure out using the schematics provided by Team Xecuter. Installation requires opening the console and soldering one on the adapters directly on top of the Tegra X1 processor. The steps below can serve as a sort of tutorial while waiting for the full installation manual to be finished and translated.
Step 0
I only used a soldering iron (Hakko fx-888d with the default tip) and a screwdriver with both Phillips and Y tips to remove the four tri-point screws on the back of the unit although I would recommend using some good quality flux in a syringe and a microscope to help verify the installation.
Step 1
Remove plastic cover and heat shield.
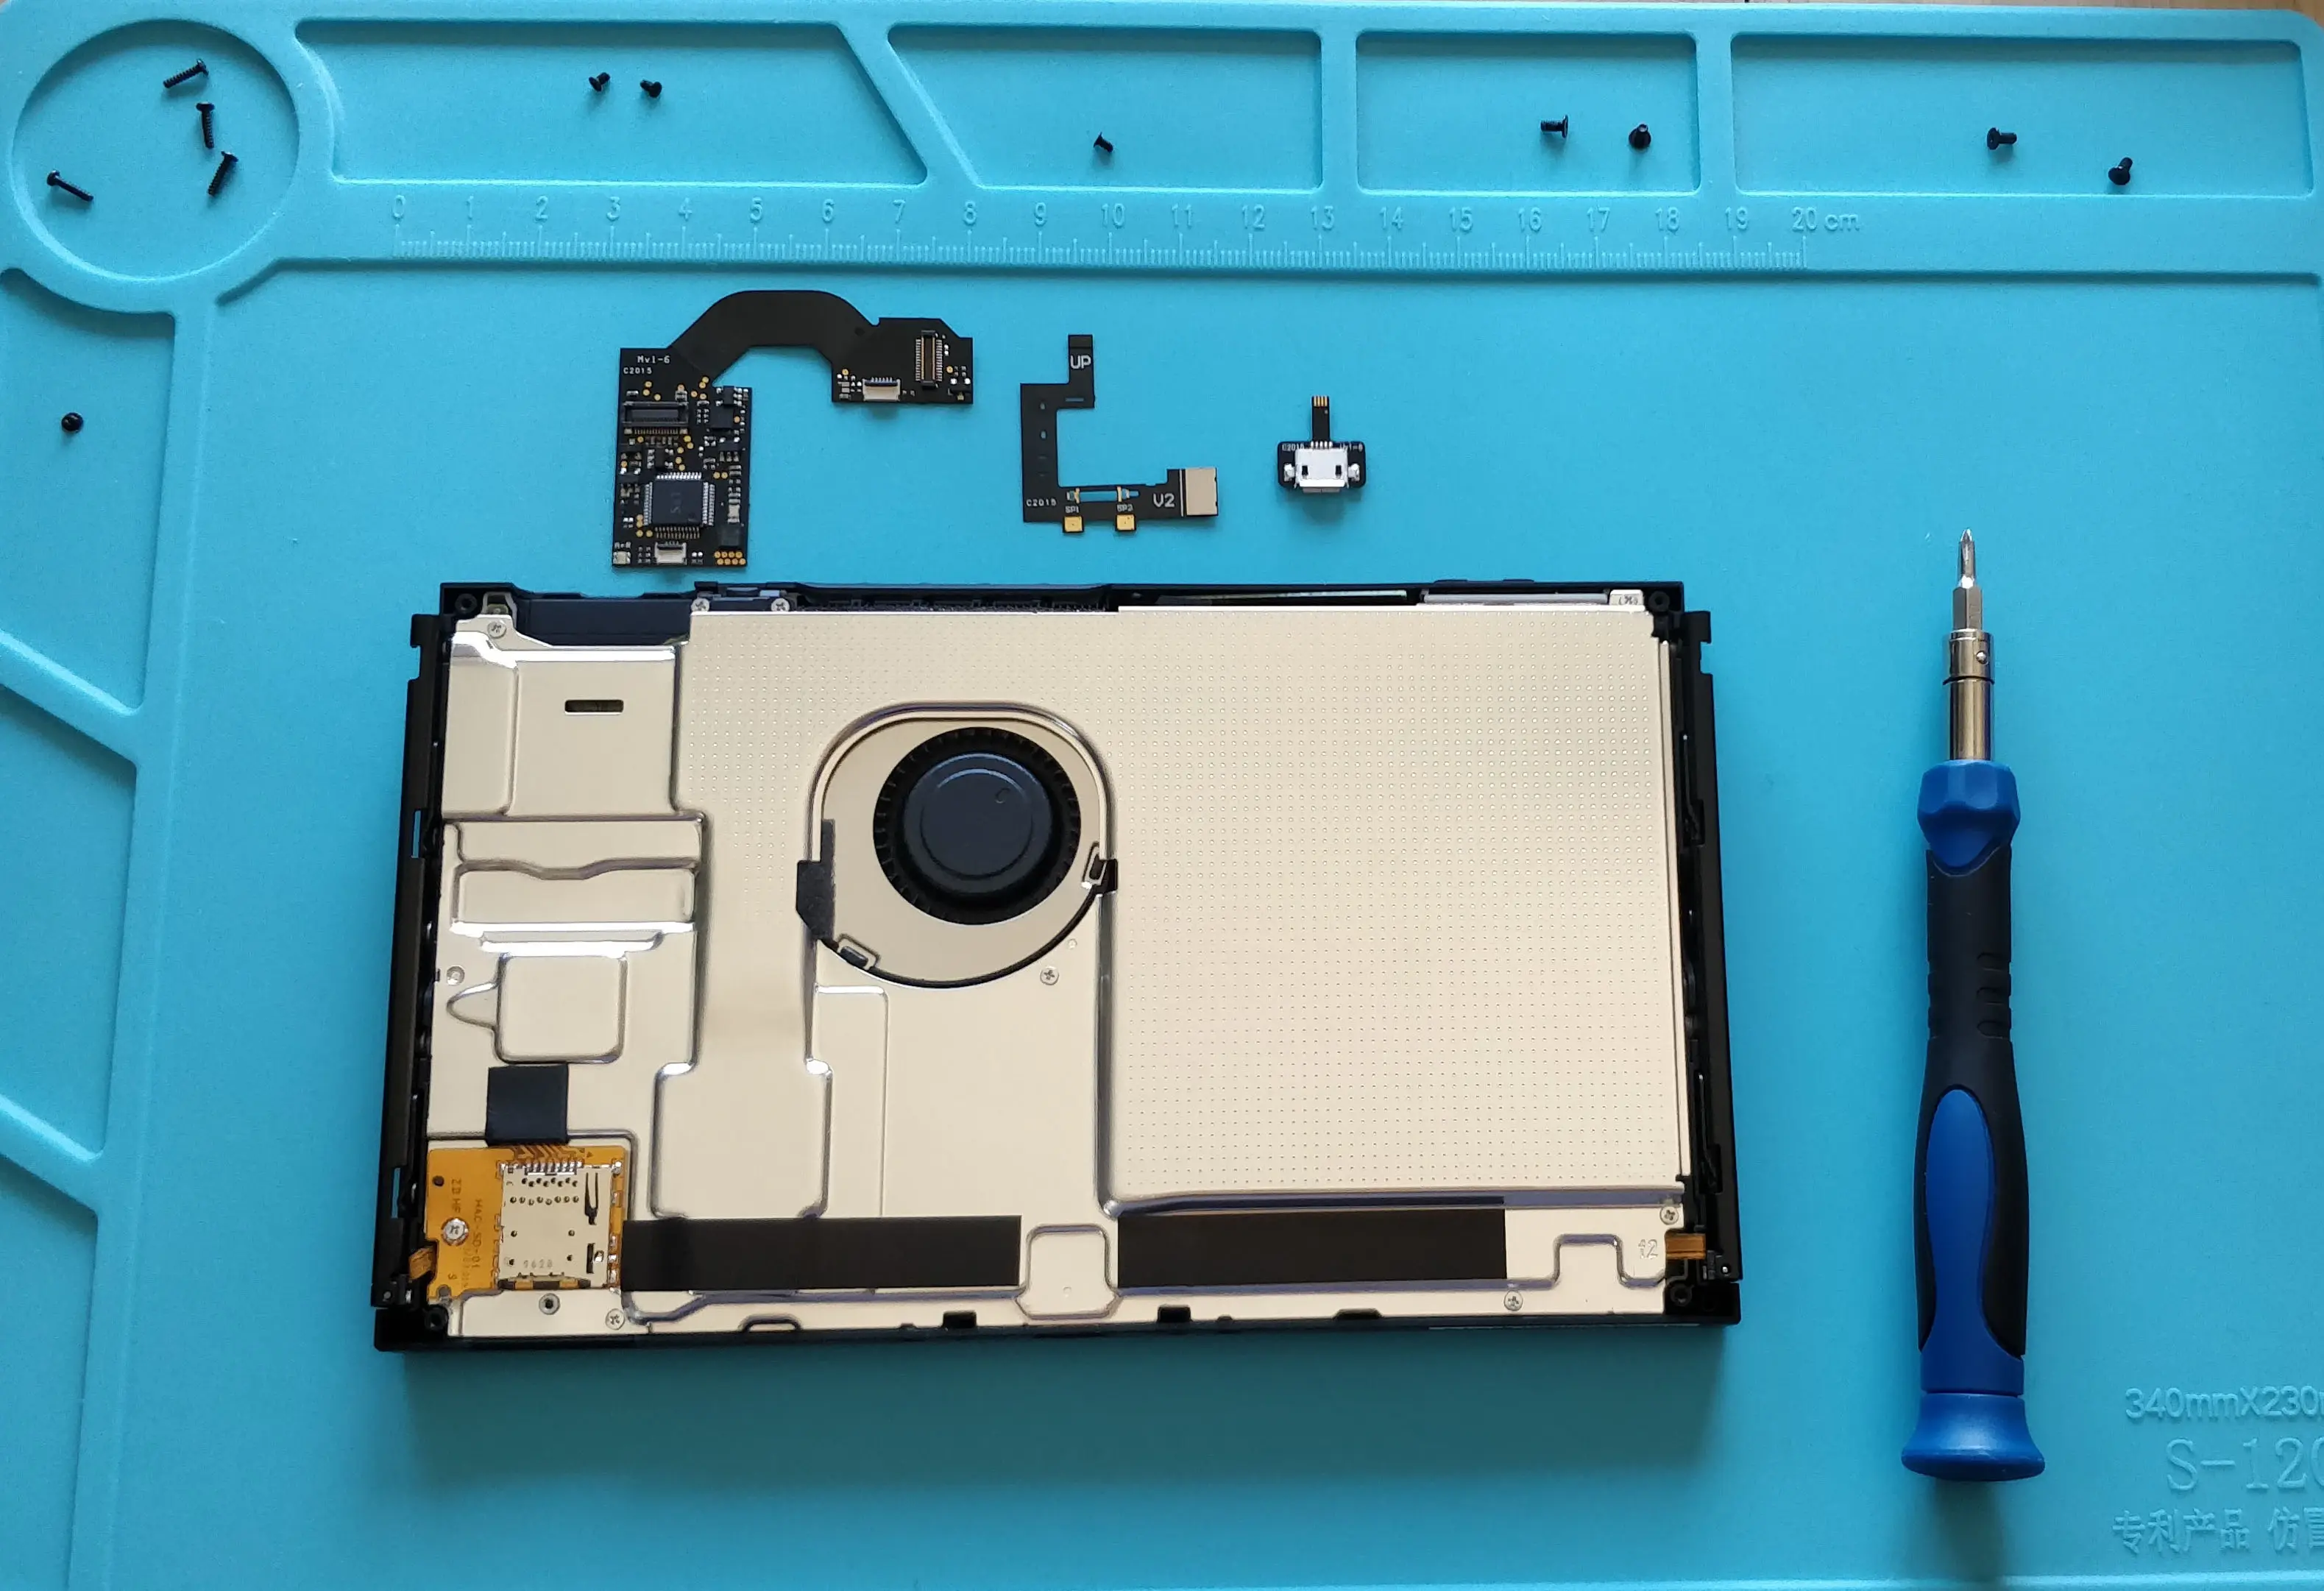
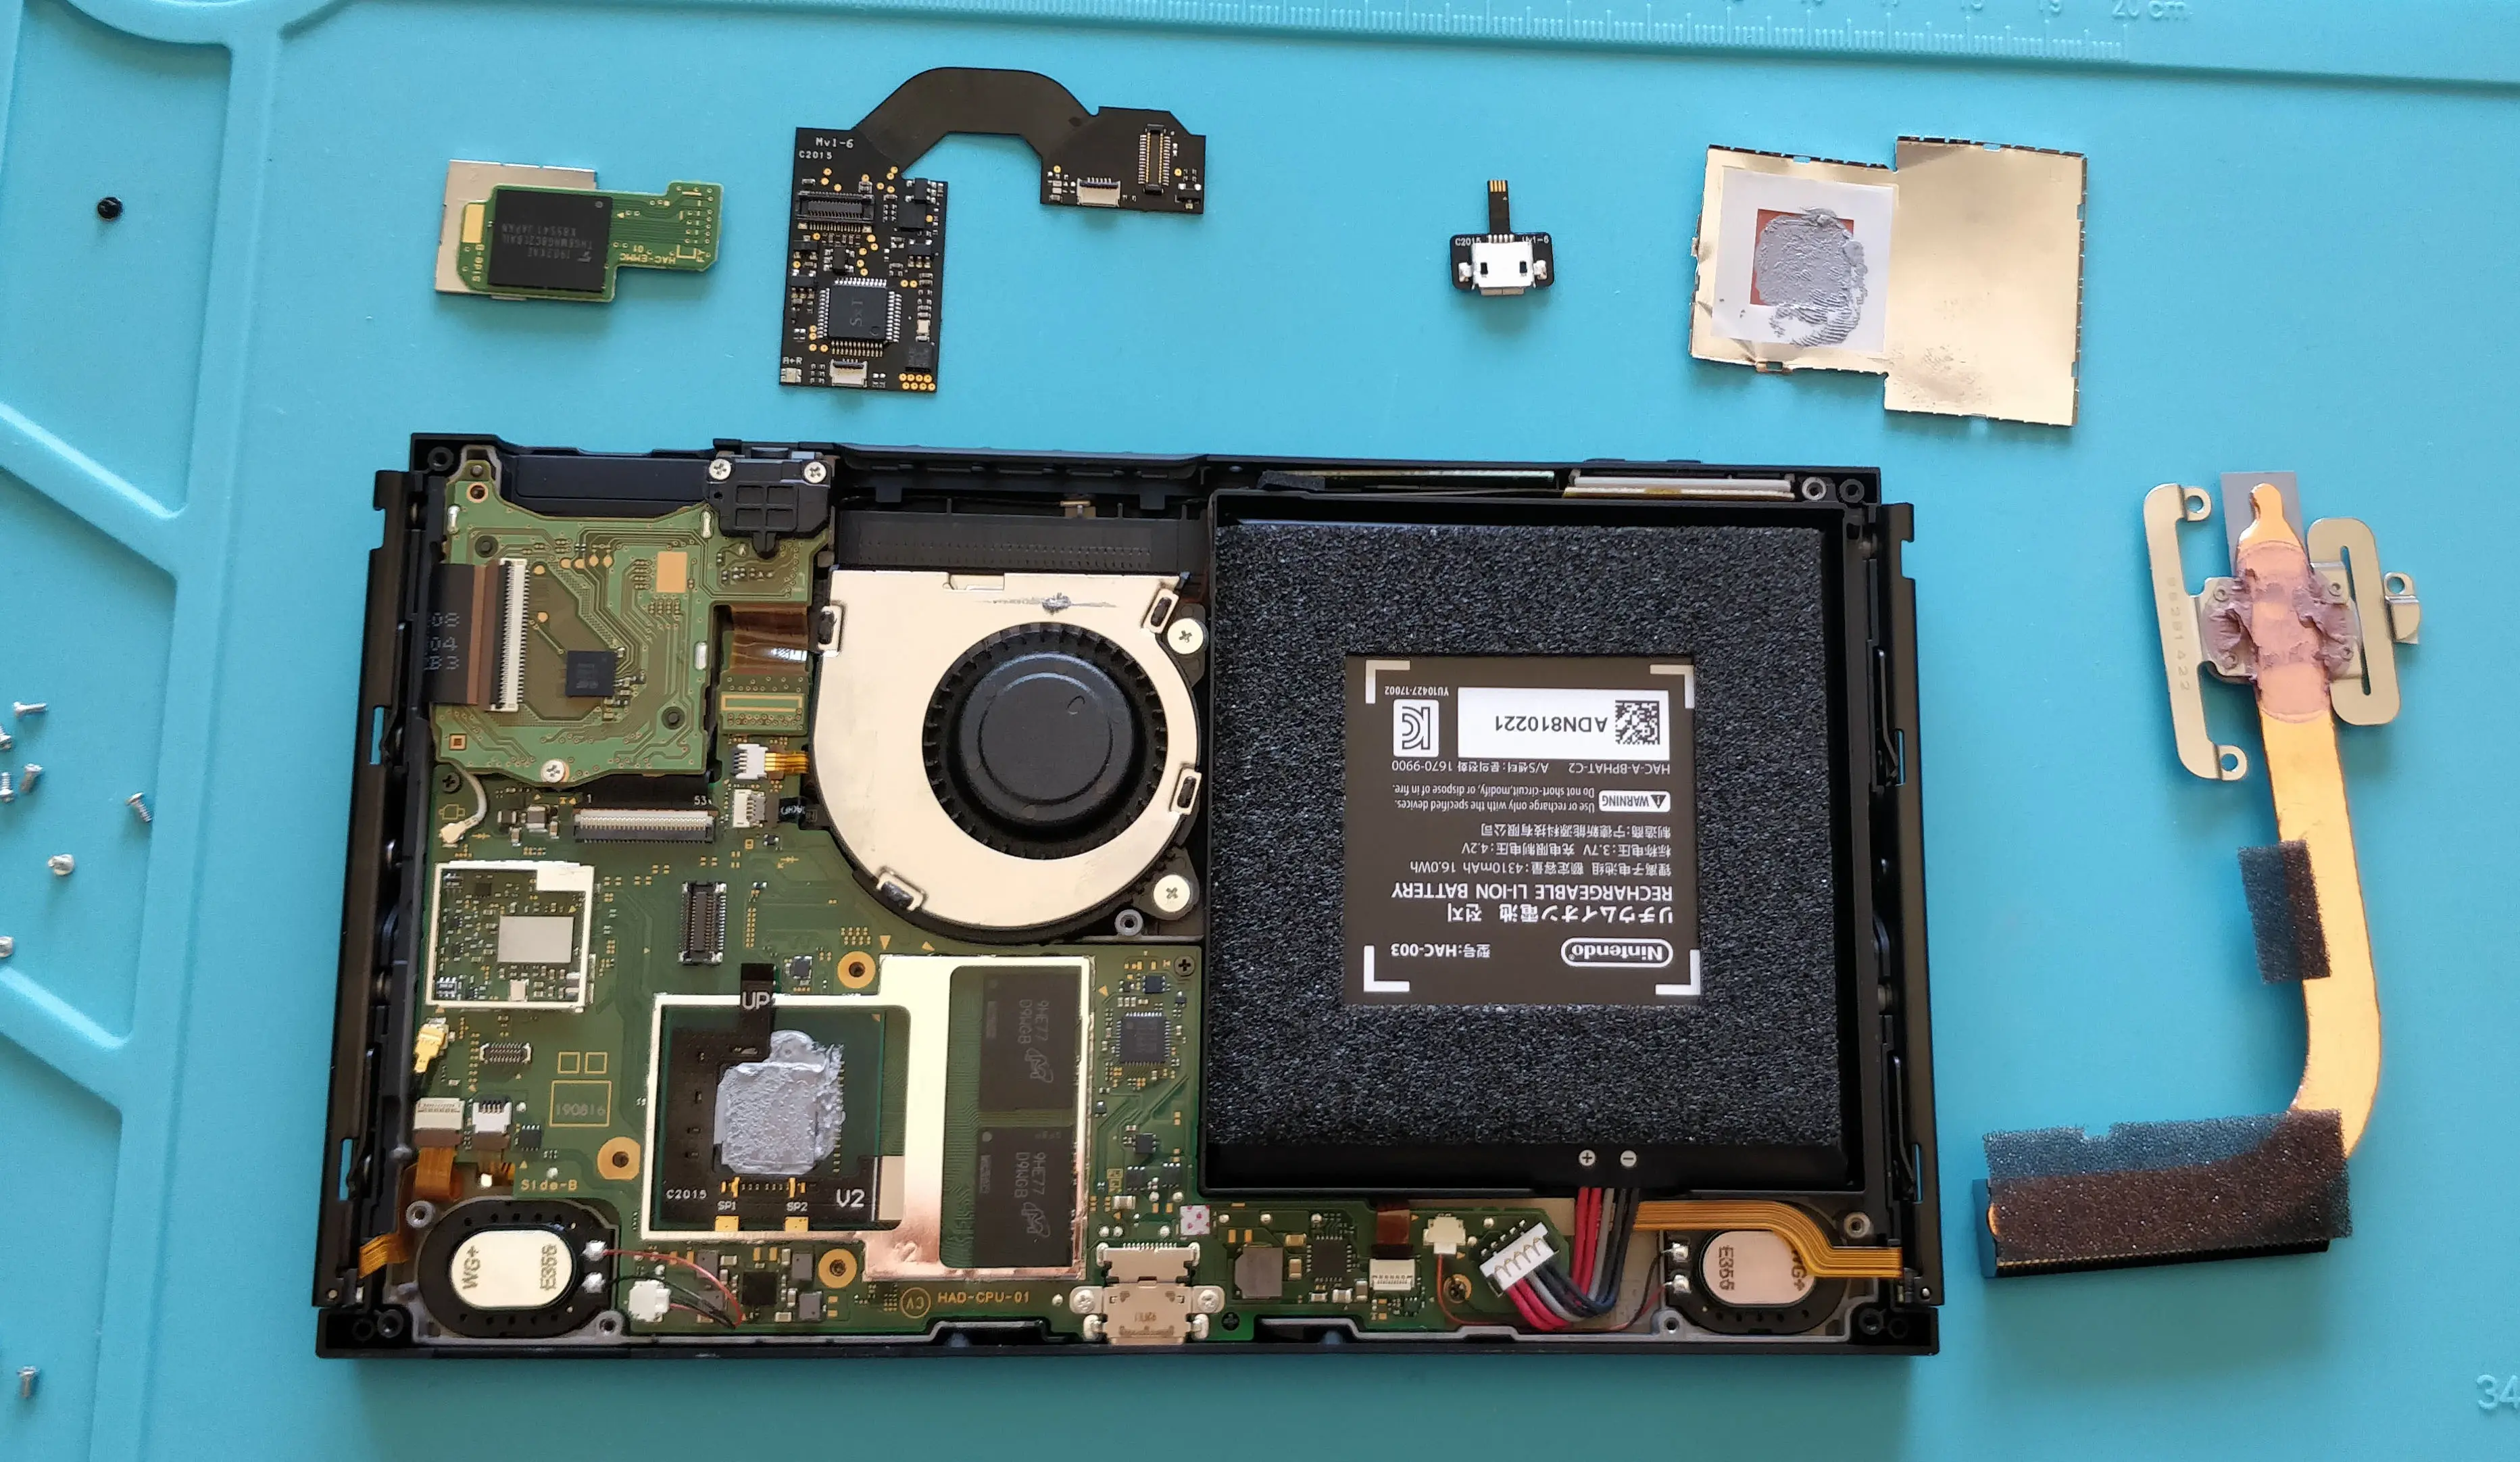
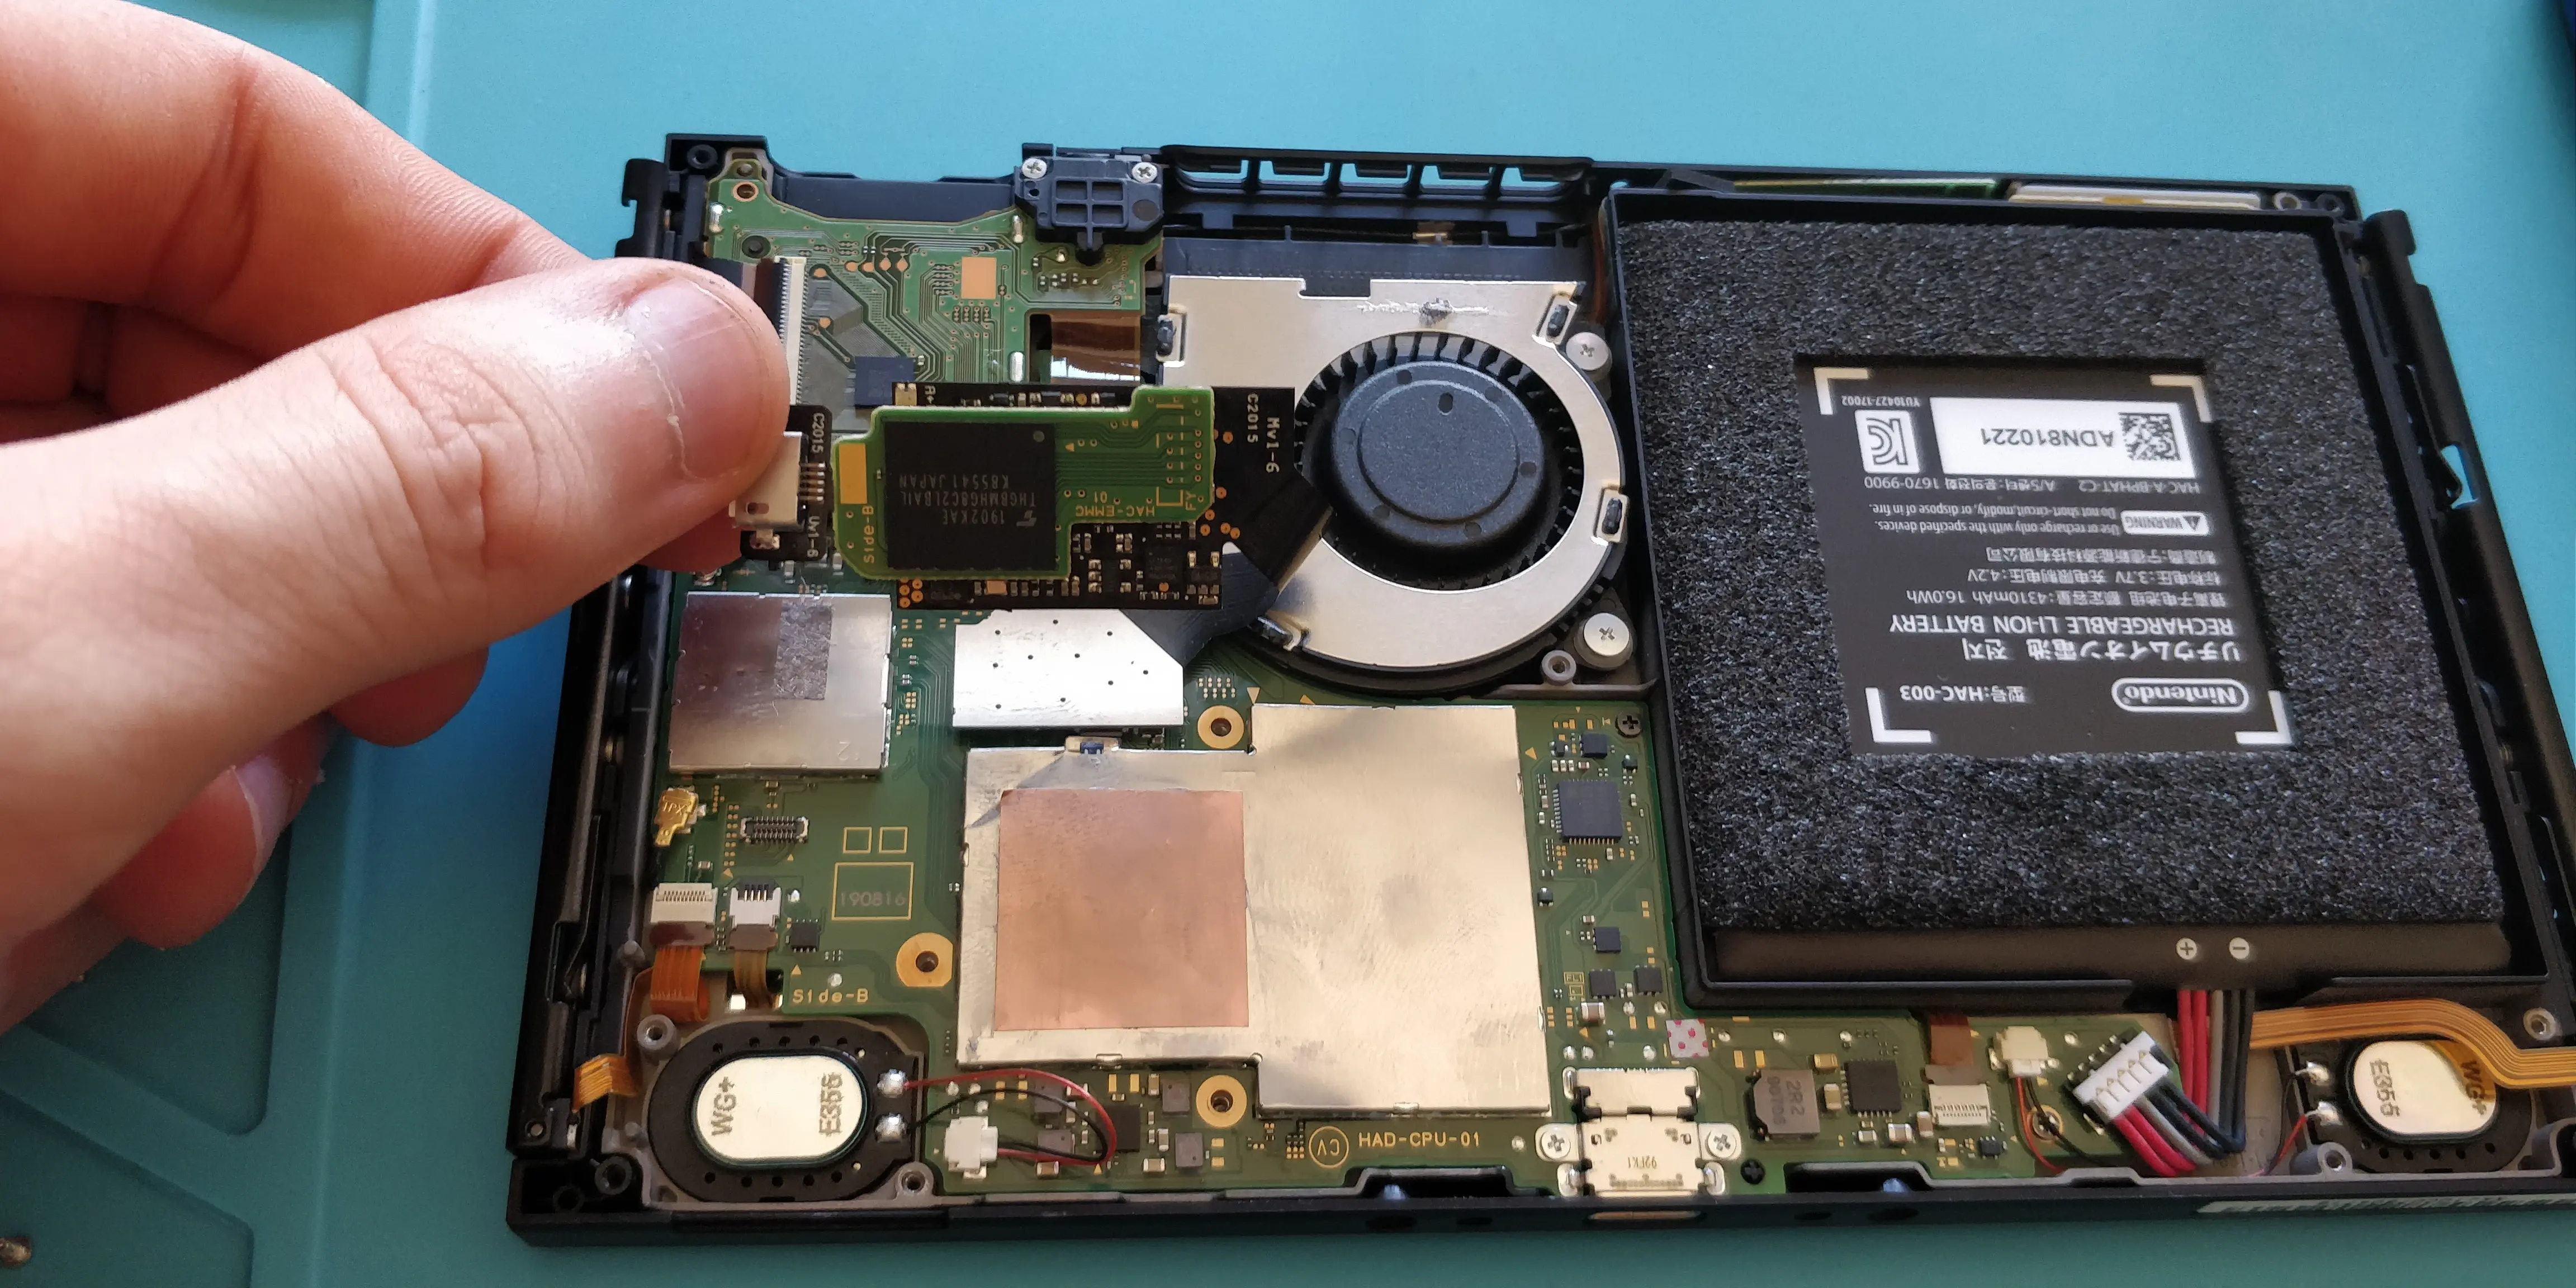
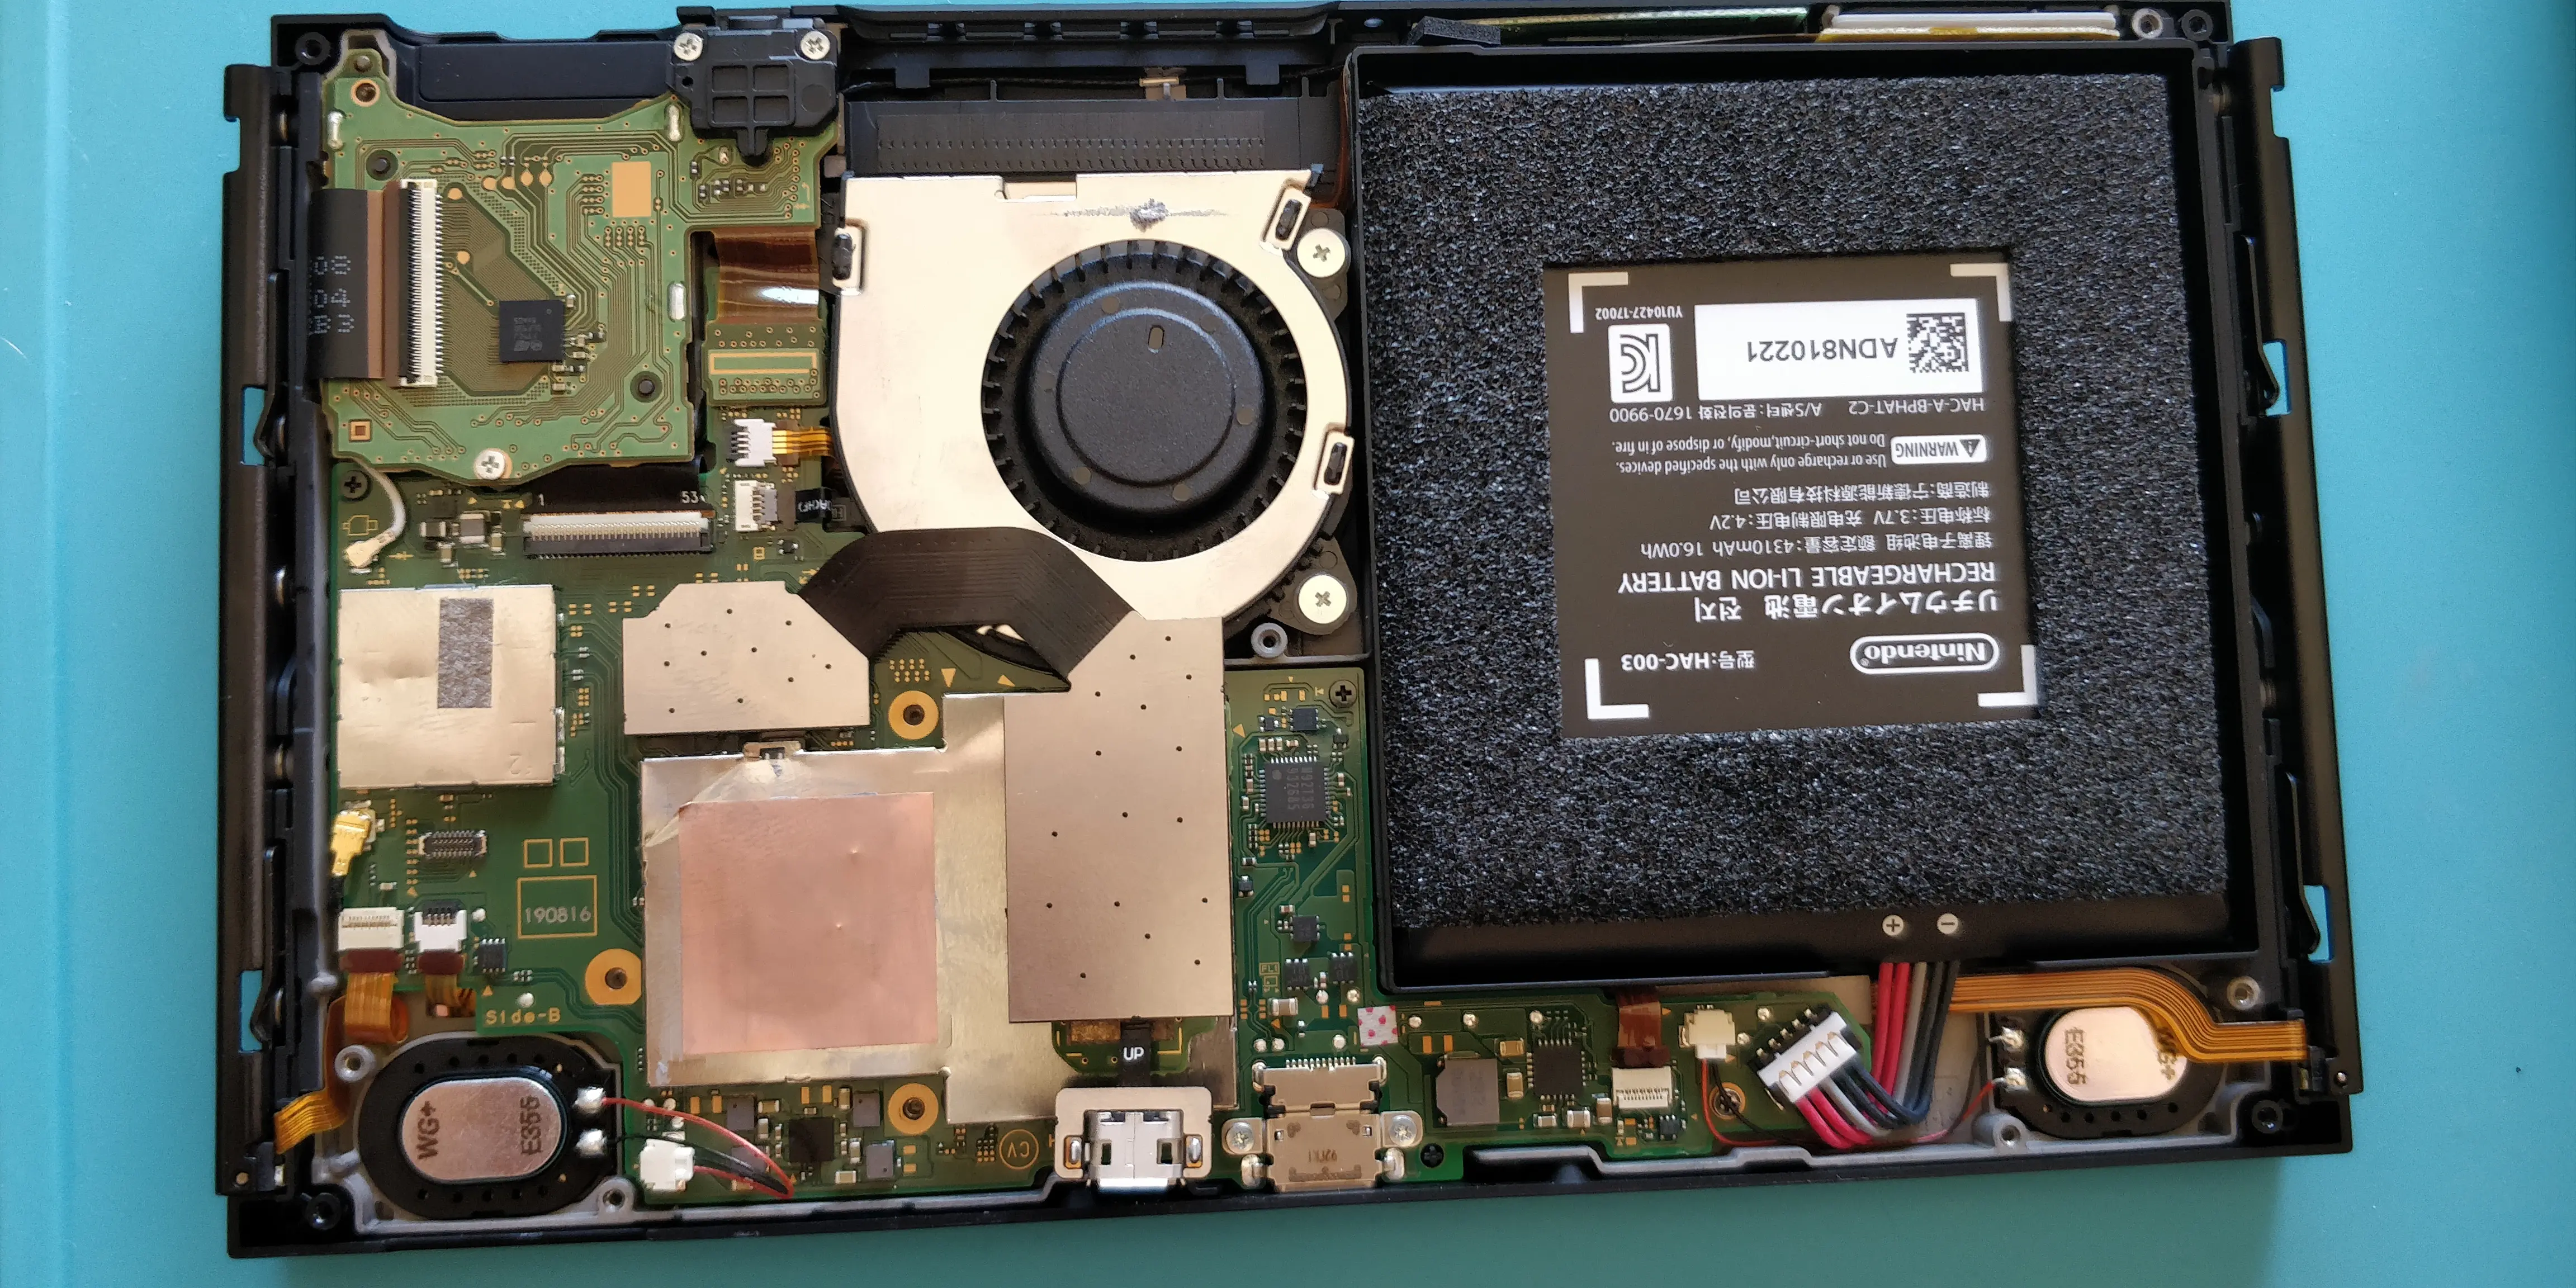
Step 2
Remove eMMC board and the heat pipe that covers the main CPU and the two RAM chips.
Step 3
Depending on your model, place the V1 or V2 flex PCB over the CPU and align the gaps with the chip capacitors.
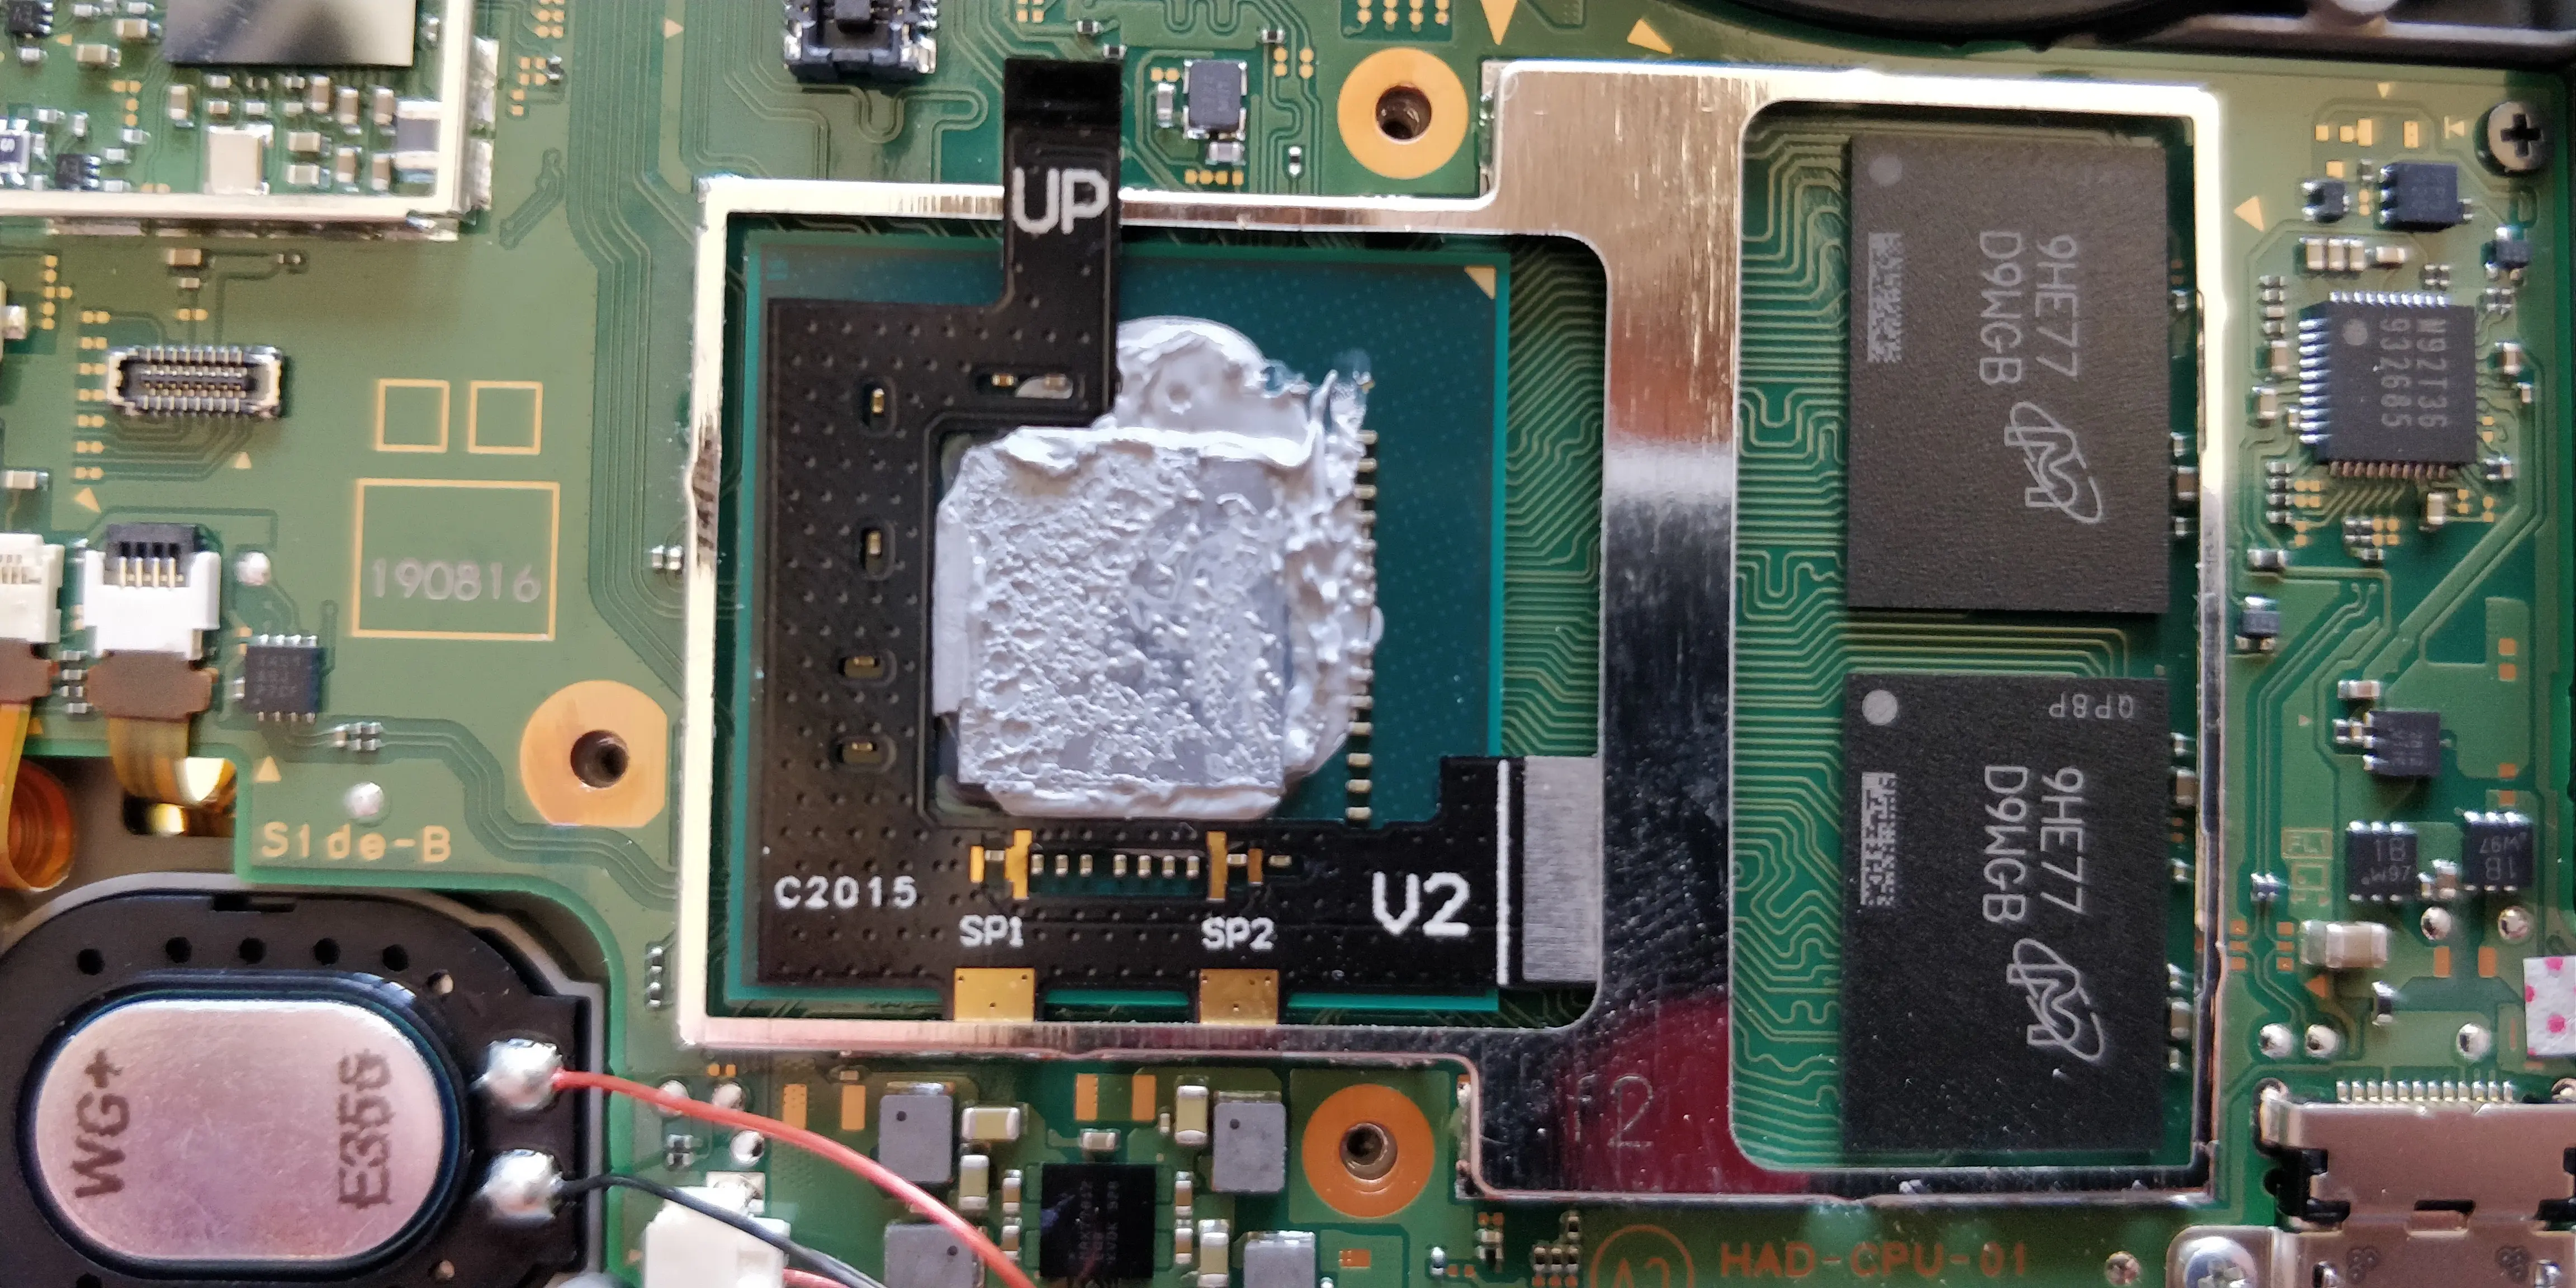
Step 4
Start by soldering the two anchor points at the bottom and continue with the capacitors on the board to the flex PCB. There are only six solder points to make but it is important to exercise caution due to the small size of the capacitors. I would recommend testing for continuity and visually checking for shorts after soldering because it is really easy to make a mistake here.
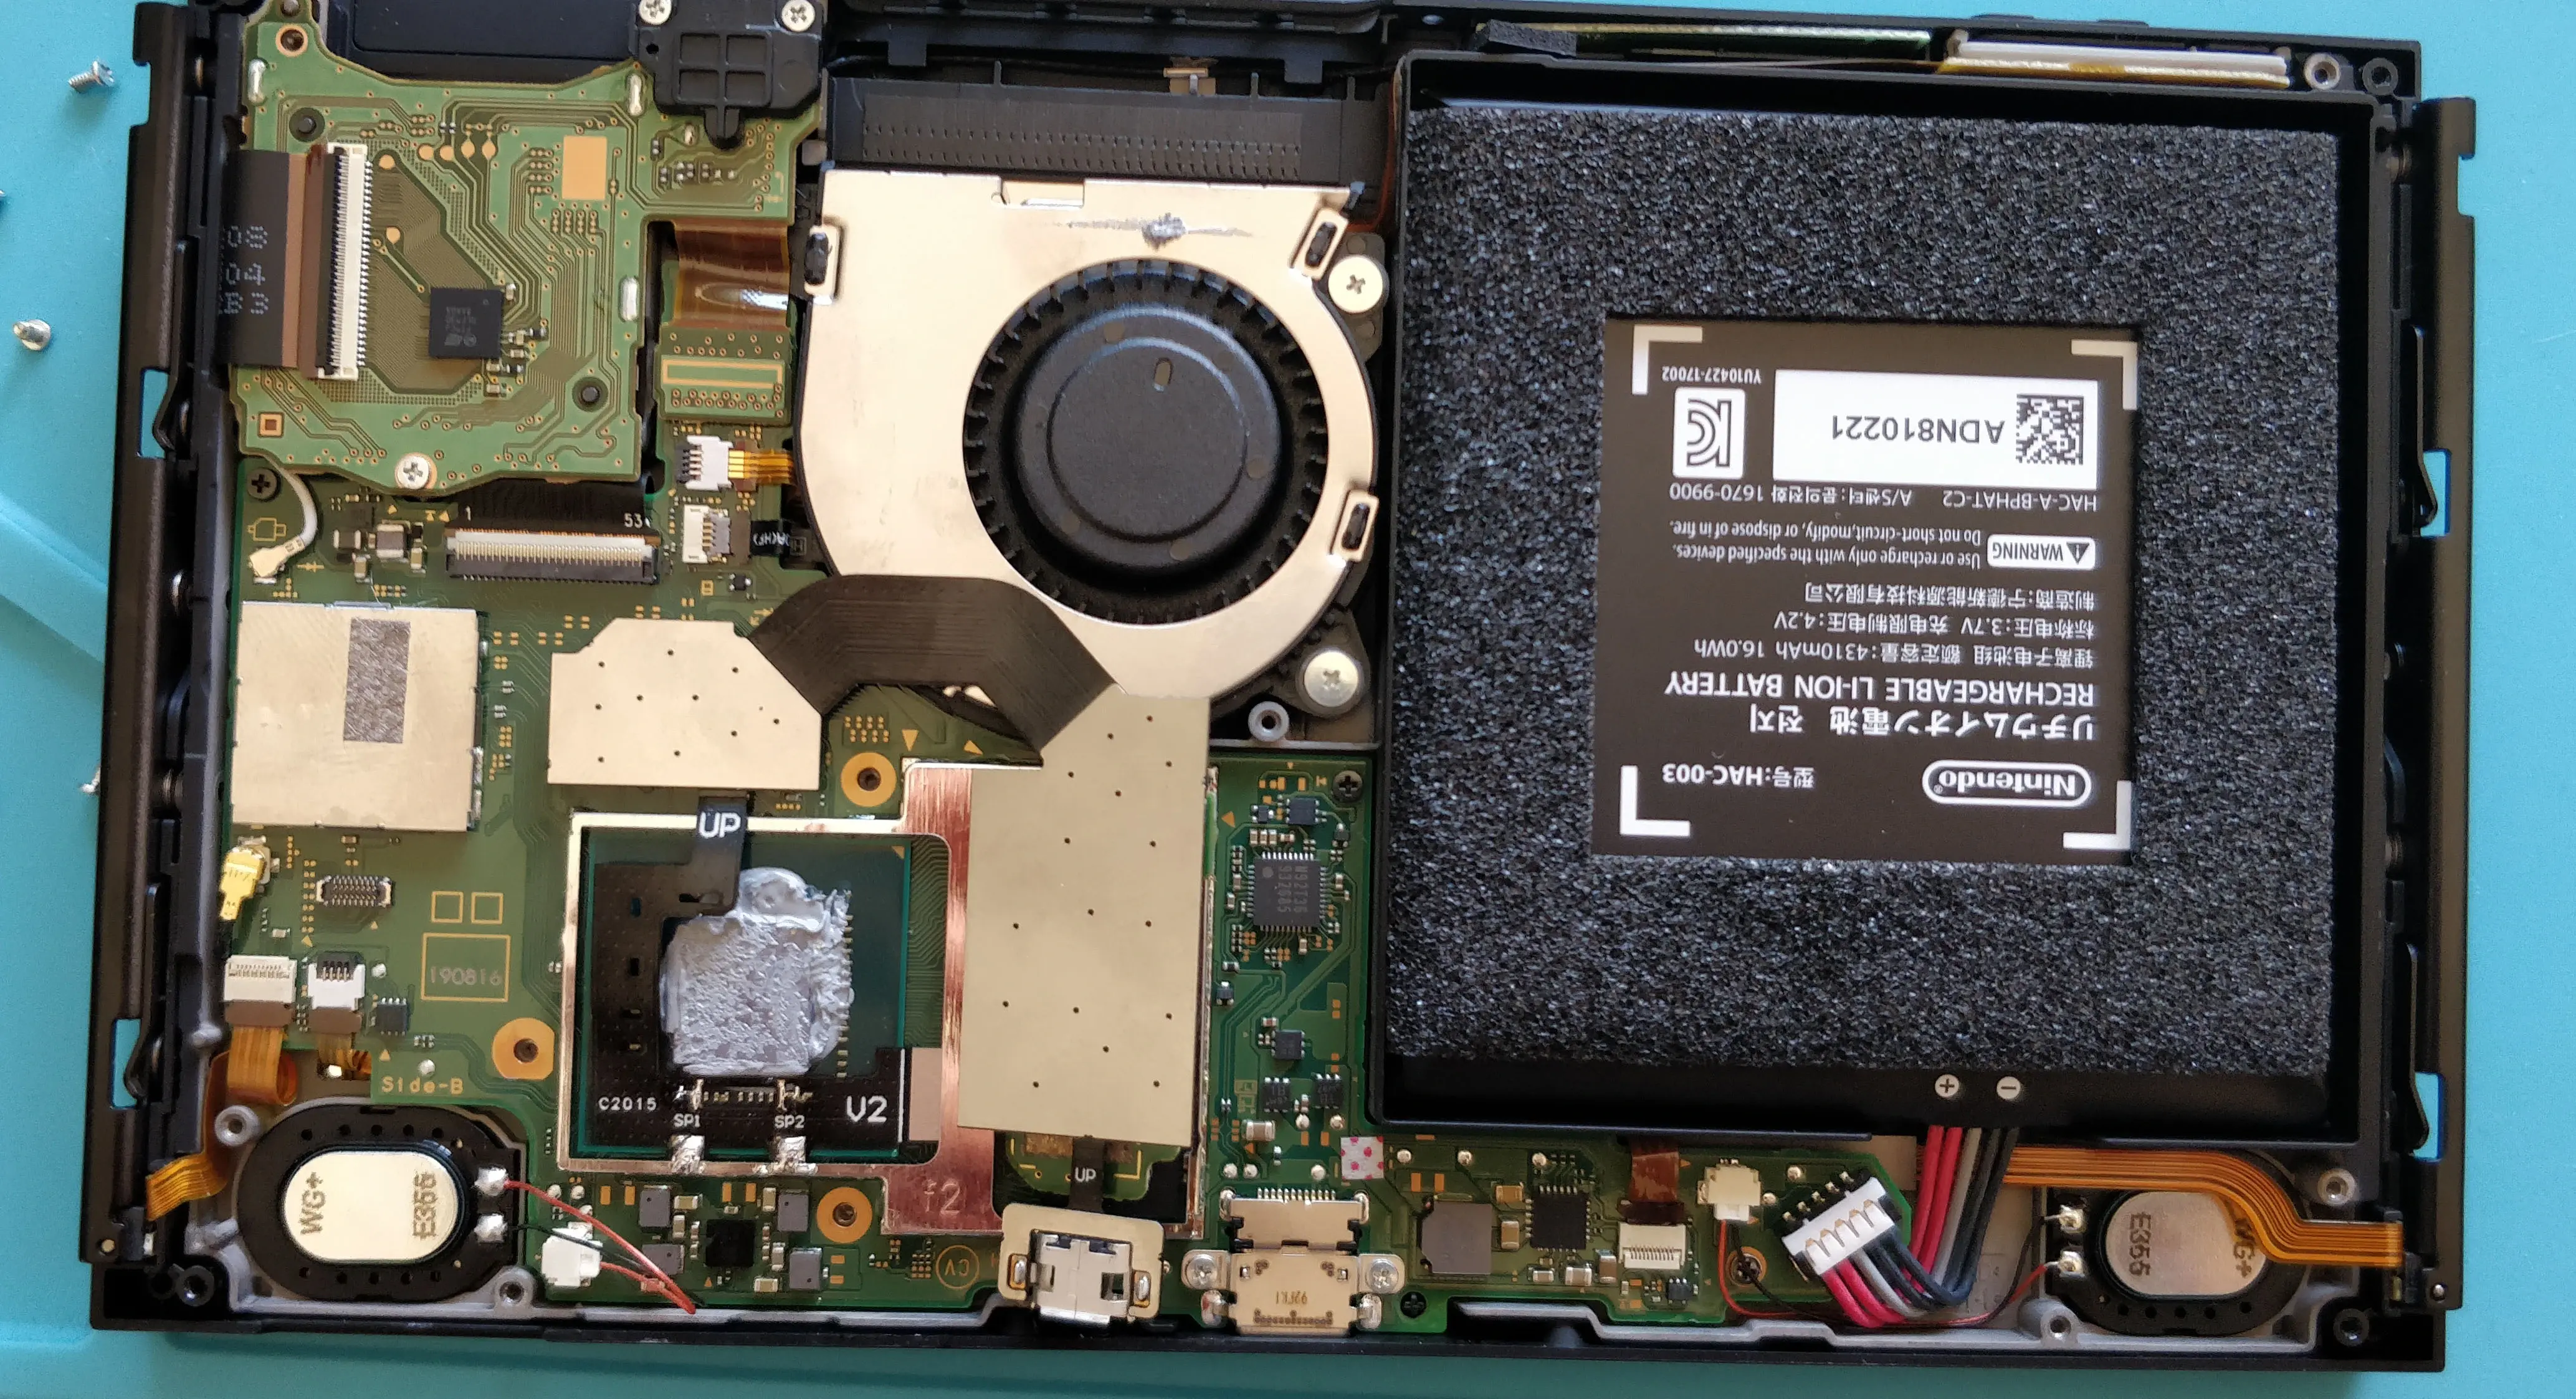
Once the PCB is soldered, connect the modchip's main board to the Switch's eMMC connector and plug the board that contains the console's eMMC chip to the other side. Connect the PCB you just soldered and plug the micro-USB connector. This last step is optional as the micro-USB connector is only needed for logging purposes and to upload new firmware to the board in case the auto-updater fails.
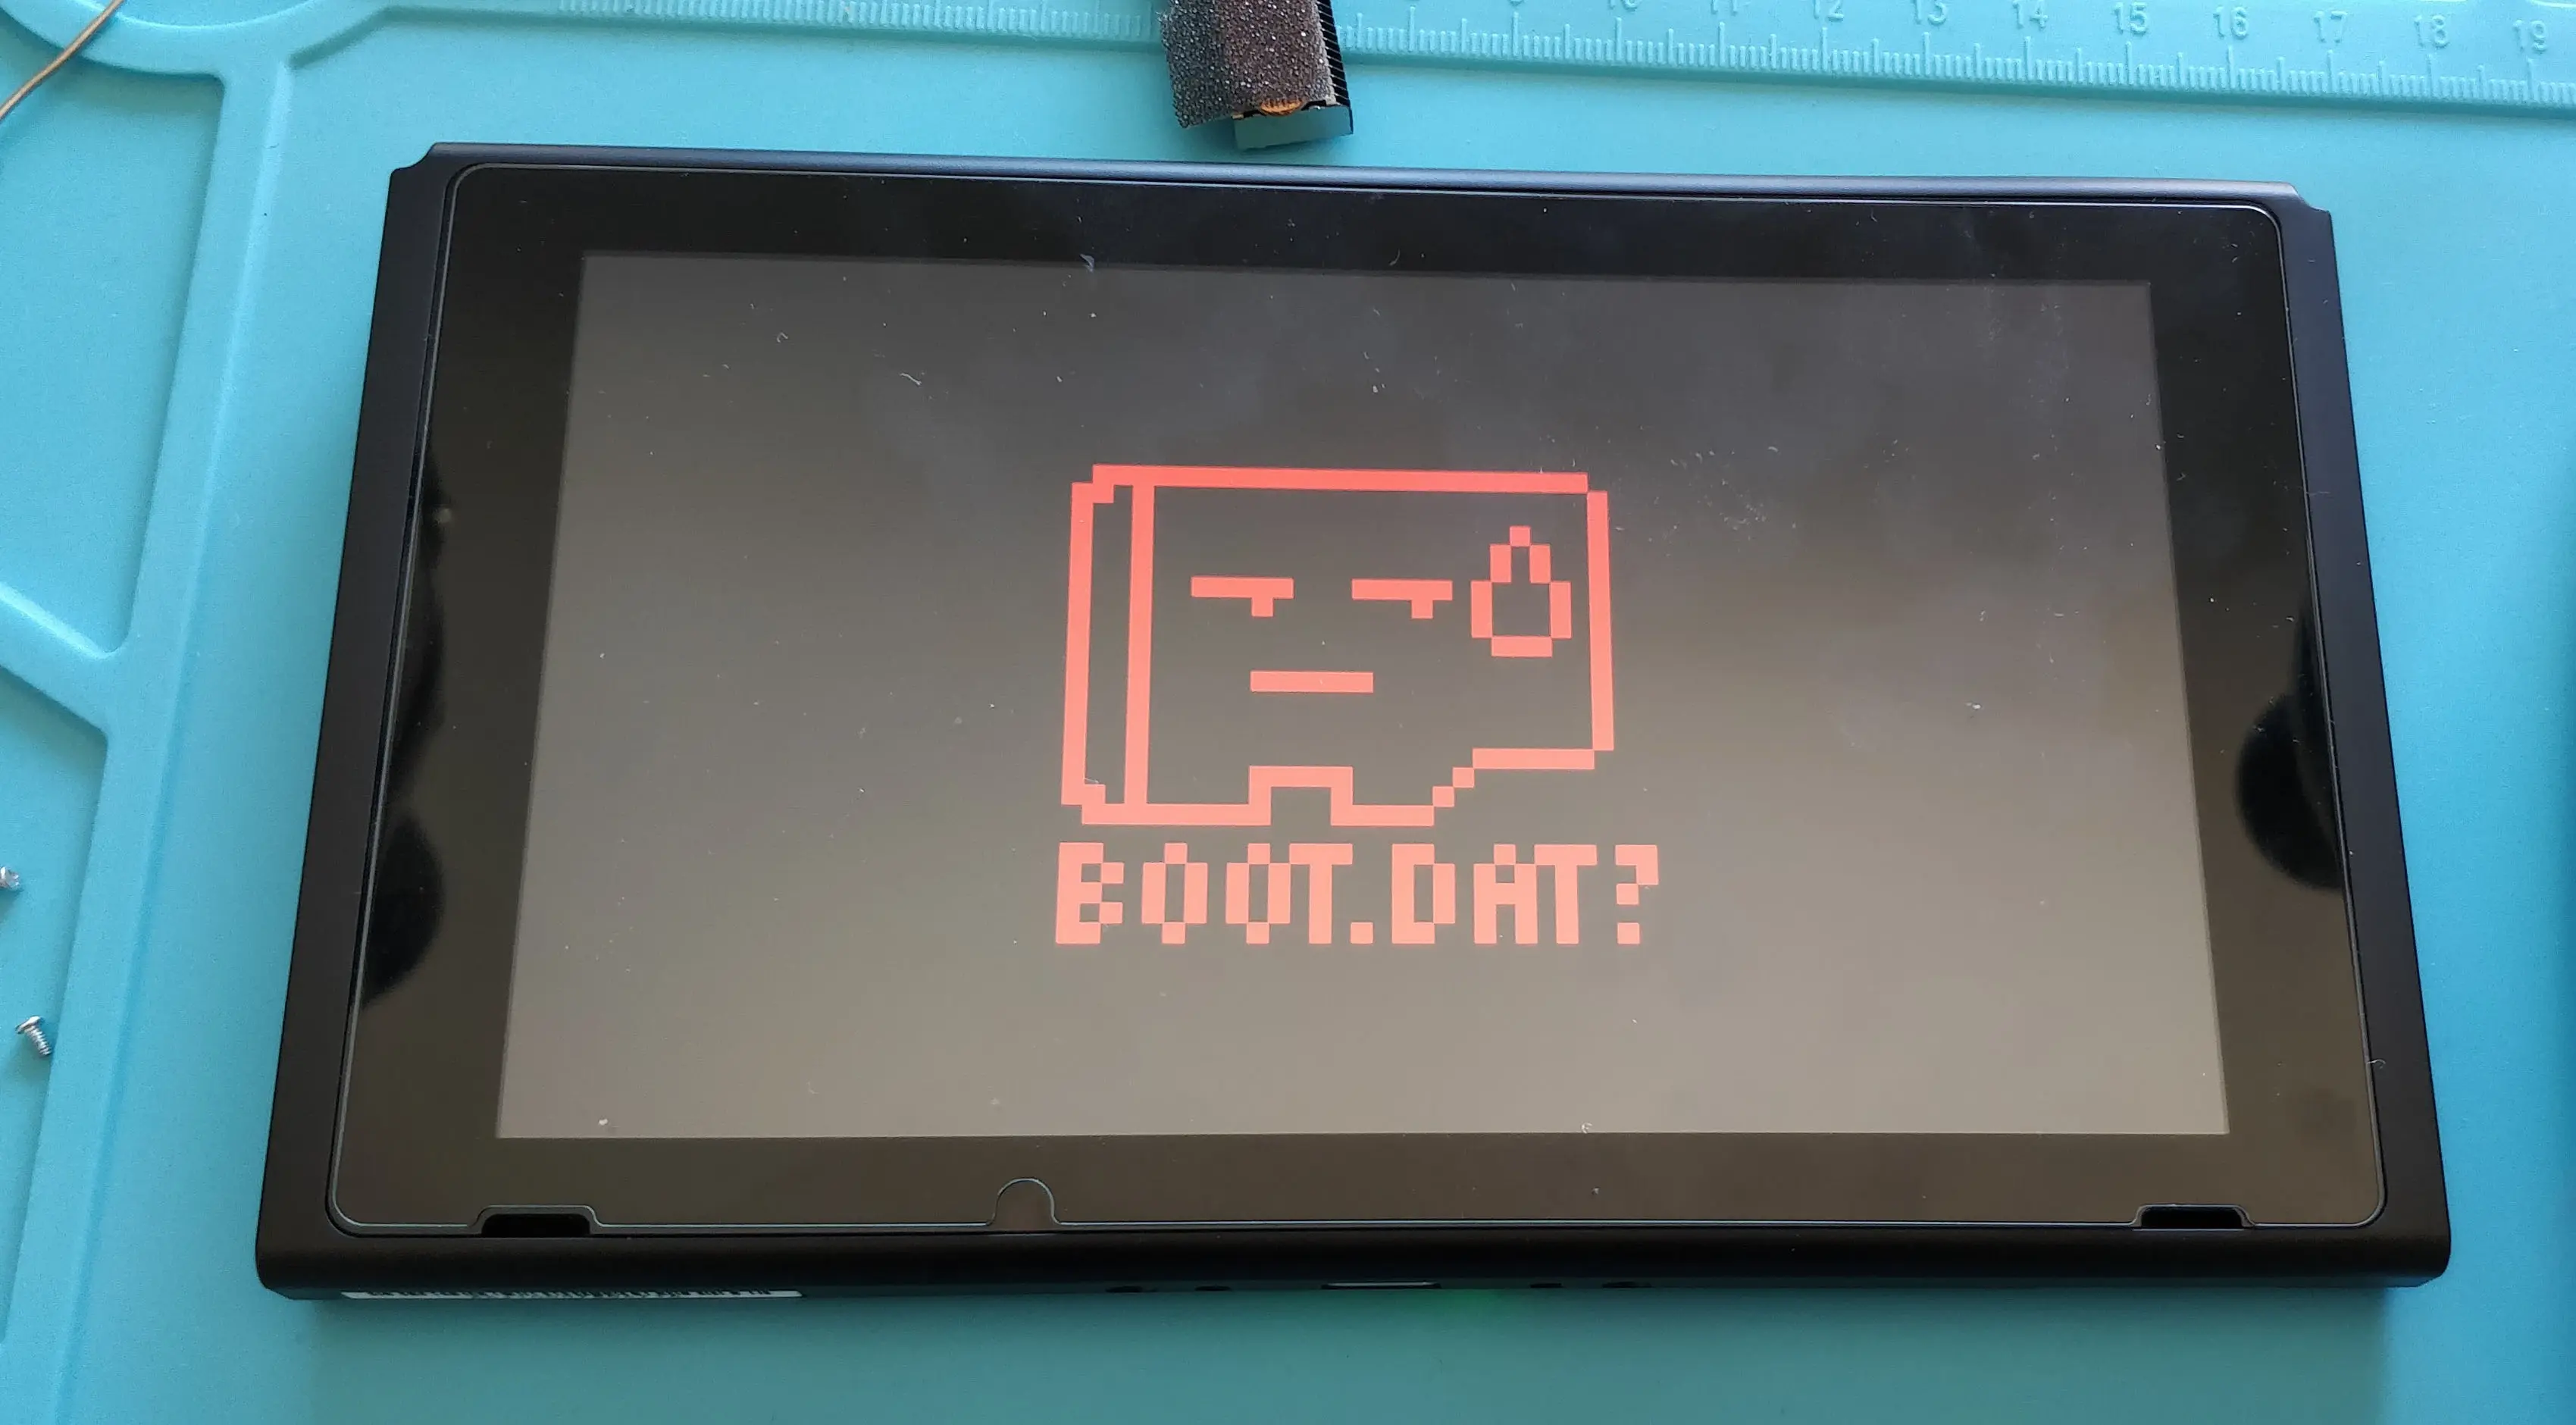
Step 5
Start the console. The main board has a LED at the bottom-left corner that will turn blue. If the glitching is successful, the LED will then turn green after a while and the screen will show a missing boot.dat error.
For the pre-production units this file needs to be requested from the developers after showing them proof that the installation has been successful (it should be available as SX OS v3.0.X on their web once retail units became available)
Once the boot.dat is inside the Micro SD card the rest of the process is the same as with the old Xecuter SX Pro dongle. A license request file is created and placed inside the Micro SD card that can be redeemed for the actual license at https://sx.xecuter.com/sxos-license.html
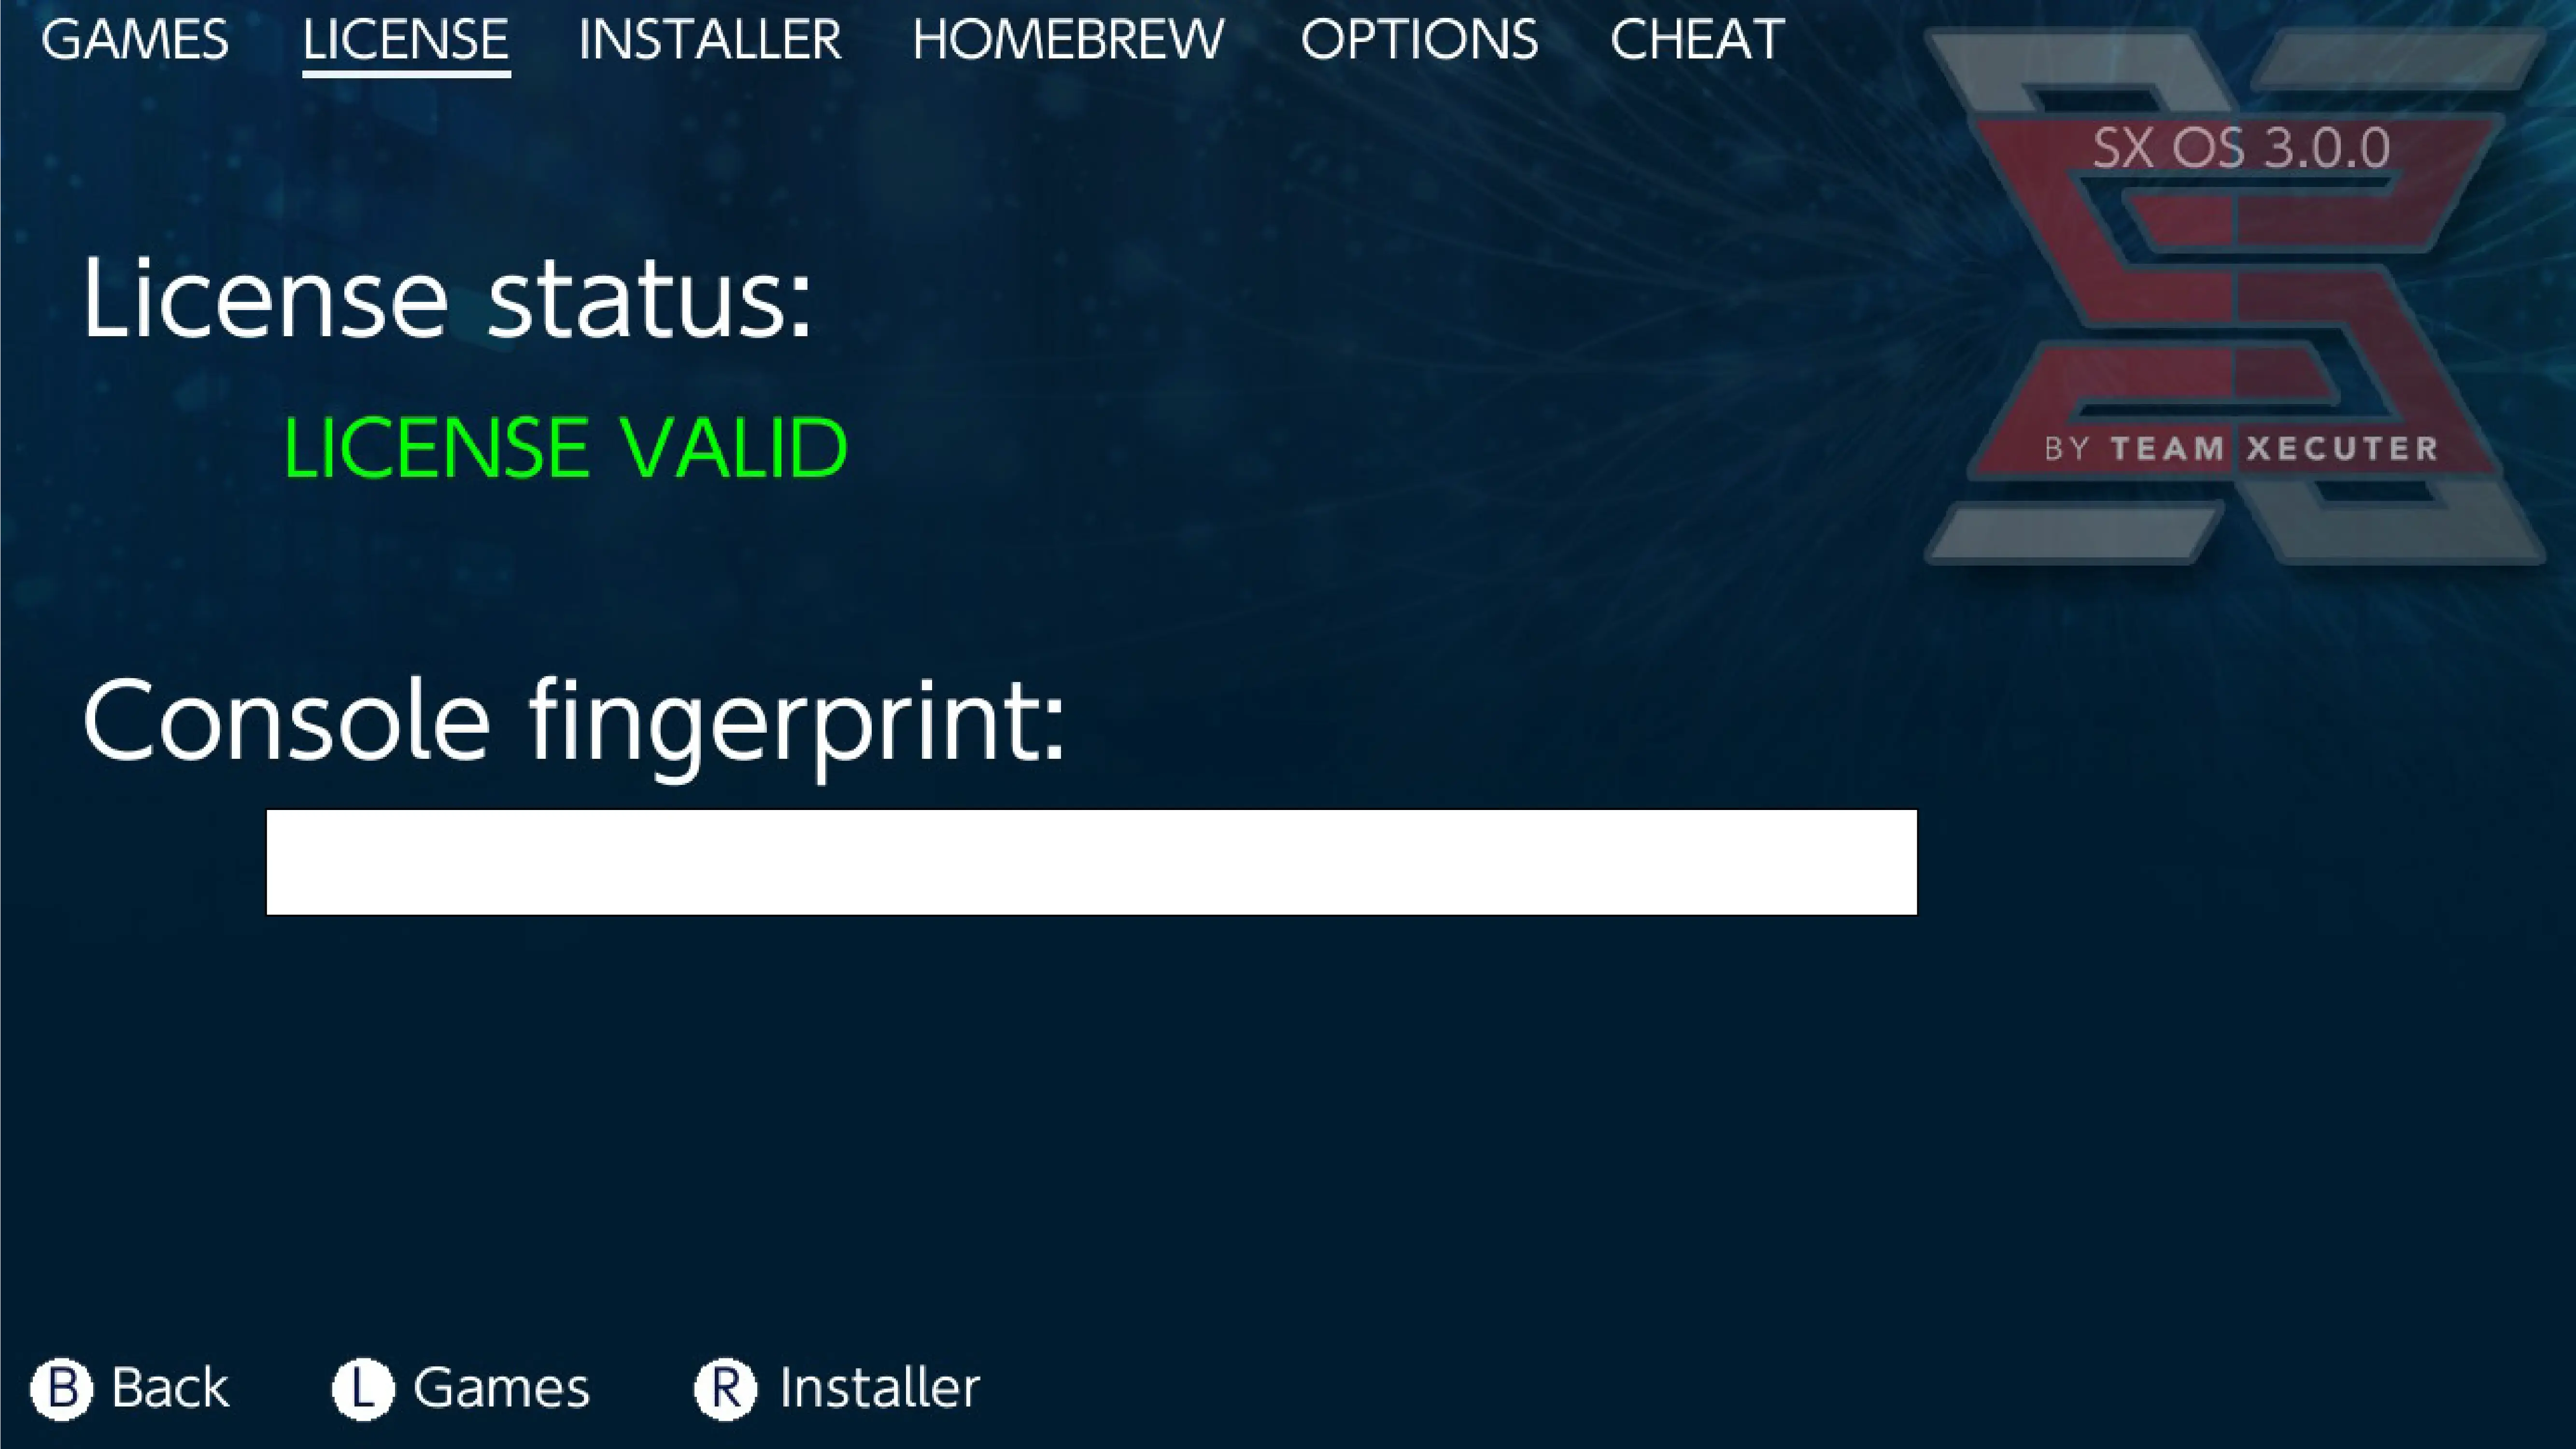
Step 6
Close everything up and verify that your license is valid on the menu that replaces the console's album
Demo
The following video shows the normal boot process with the modchip installed.
Glitch Explanation
UPDATE October 2020: For legal reasons I have removed my explanation of how this attack works. If you are interested in Electrical Glitching Attacks and Switch Security I would recommend reading the following links:
- Methodically Defeating Nintendo Switch Security
- 34C3 - Console Security - Switch
- Open Chaos - Glitching the Switch
- Bypassing Secure Boot using Fault Injection
- Implementing Practical Electrical Glitching Attacks
Testing and Conclusions
I have tested payloads, homebrew, emulators and NSP/XCI backups with everything working flawlessly. The only problem I ever had was related to booting with emuNAND vs sysNAND but I was able to solve it after some tinkering.
To sum up, the modchip is real and will probably be available to the general public very soon™ (mid to late June).